Our Go-To Magic Bars (No Coconut, No Nuts)
I come from a dessert family, and one of my all-time favorite recipes is our magic bars! We call them 7-layer bars, but we make our magic bars without nuts (or coconut). So really, they’re only five layers. A technicality.
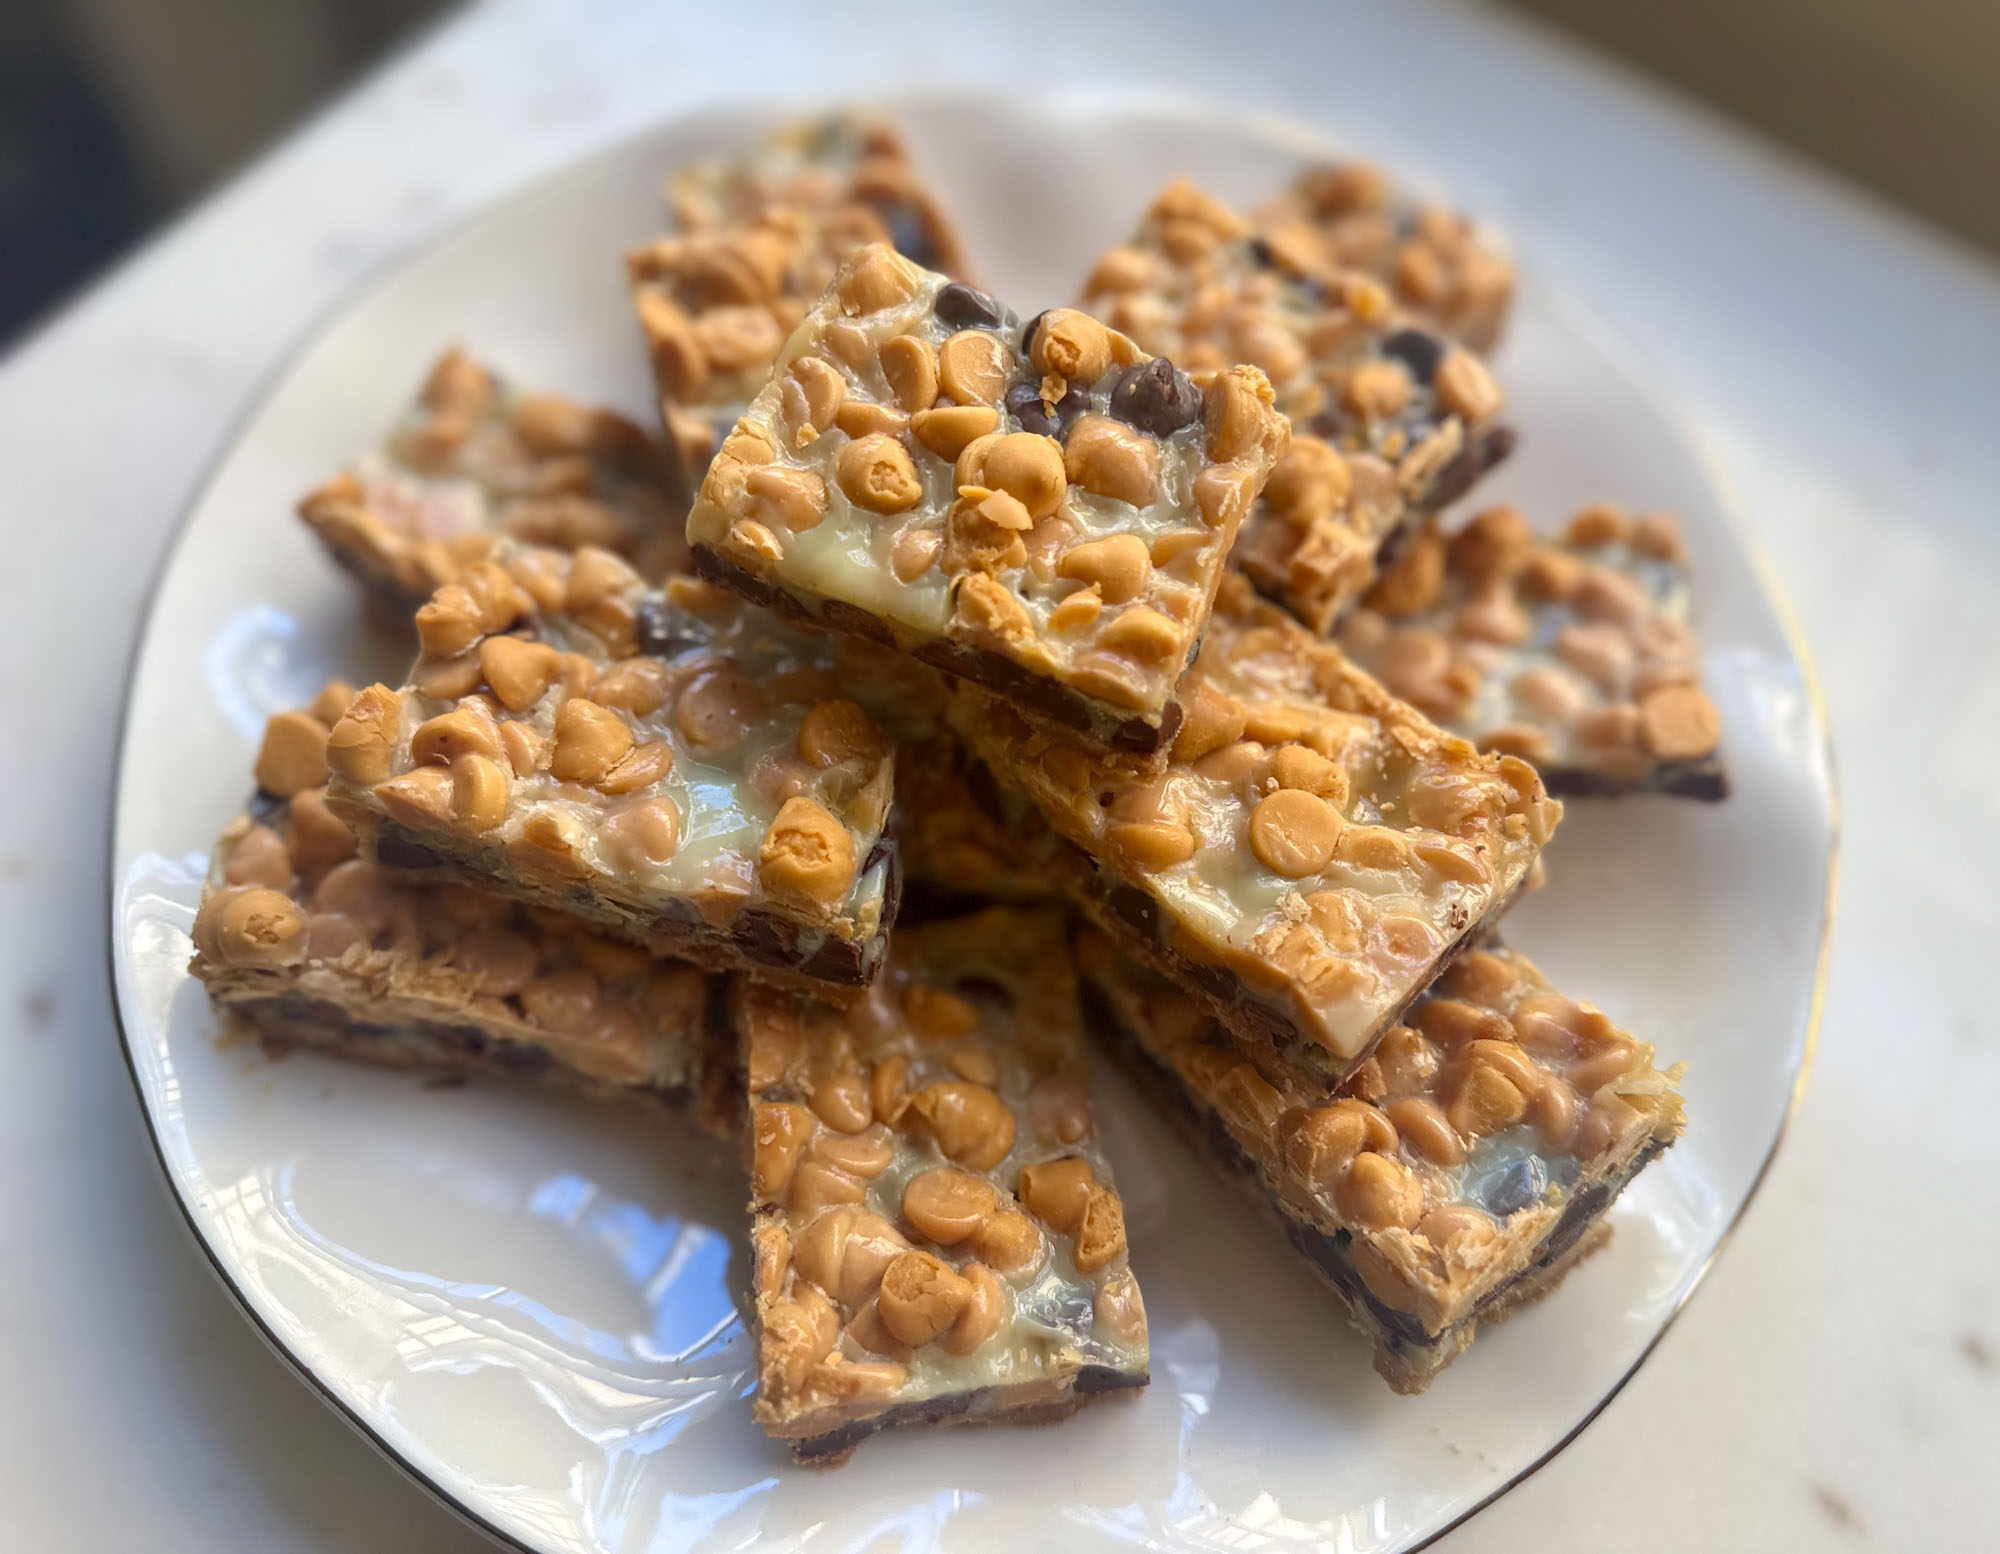
If you’ve never had a magic bar, think buttery graham cracker crust, gooey condensed milk, and sweet layers of chocolate and butterscotch. They’re delicious year-round, but we love making them around the holidays since butterscotch is so festive.
If you’re searching for a crowd-pleasing dessert recipe that you can make in advance, look no further! These bars are always a hit, and they’re so easy it’s ridiculous.
This post contains affiliate links that earn me a commission. For more information, read my disclaimer.
How to Make 5-Layer Magic Bars
Now, let’s dive into the recipe!
Ingredients
5 layers = just 5 ingredients! We skip the nuts and coconut because, honestly, we just think they taste better without (sorry, not sorry).

I’m not a fan of nuts in baked goods; I feel like the texture interferes. Coconut has the same issue, and the flavor can be a little distracting when paired with other ingredients.
Bonus: leaving them out makes the recipe a little more allergy-friendly! That said, if you love nuts or coconut, feel free to add them back in.
Here’s what you need for our 5-layer bars:
- 1/2 Cup (1 Stick) of Salted Butter
- 1 13.5 oz Box Graham Cracker Crumbs (or 14.4 oz box Graham Crackers)*
- 12 oz Bag Semi-Sweet Chocolate Chips
- 12 oz Bag Butterscotch Chips
- 1 14 oz Can Sweetened Condensed Milk
*Not all graham cracker crumbs are created equal — I usually stick with Honey Maid, but they’ve been hard to find lately (not sure if there’s a shortage or what). This brand on Amazon has good reviews, but I haven’t tested it yet.
Using crumbs will make your life easier, but if you can’t find them, you can blitz regular graham crackers into crumbs using a food processor or blender, or by taking out some aggression with a Ziploc and a rolling pin.
Yield: This recipe makes approximately 12-15 large bars or 18-24 smaller ones.
Equipment
I like to make these in a 13×9 pan (I love my Pyrex!), but you can honestly use a variety of pan sizes. You may need to adjust the quantities slightly, but this recipe is flexible and always turns out.
Whatever pan you use, I strongly recommend lining it with foil — these bars are pretty messy, and it will be difficult to remove them from the pan without it.
My favorite part about this recipe — it’s all made directly in the pan, so you don’t even need a mixing bowl or utensils! Does it get any easier than that?
Instructions
Once you’ve got your ingredients and equipment, follow these steps to make your magic bars.
- Preheat the oven to 375°F. Line a 13×9 pan* with foil and add the butter directly to the pan.
- Once the oven is preheated, place the pan in the oven and cook for around five minutes, until the butter is melted. Keep an eye on it to make sure the butter doesn’t burn.

- Remove the pan from the oven and add enough graham cracker crumbs to cover the bottom of the pan and absorb the butter. Pat until firm. You may see a few wet spots, but you want the butter absorbed with a mostly firm base.

- Sprinkle chocolate chips evenly across the graham cracker base.

- Sprinkle butterscotch chips evenly on top of the chocolate chips, filling in gaps where possible.

- Drizzle the sweetened condensed milk evenly over the top, especially around the edges. It will even out during baking, so don’t stress about making it perfect.


- Bake for 15-25 minutes, until bubbling and just starting to turn golden brown around the edges. Do not overbake, as the bars will firm up after baking.

- Cool at room temperature, then refrigerate before slicing for best results.
- Trim edges using a sharp knife, then cut into desired-size rectangles. We trim the edges since they’re usually firmer and not quite as tasty, but it’s a personal preference.

- Store in an airtight container at room temperature or in the refrigerator. Bring to room temperature before serving.

*If you’re using a different-sized pan, you may need to increase or decrease the quantity of your ingredients slightly, but this recipe is pretty forgiving and will generally just produce thicker or thinner bars.
Your goal should be to completely cover the bottom of the pan with the butter and graham cracker crumbs, and then mostly cover with the top three layers (a few gaps are fine). As the bars bake, they will merge together.

Magic Bars (No Nuts, No Coconut)
Equipment
- 1 13×9 Pan
- Aluminum Foil
Ingredients
- ½ cup salted butter
- 1 box graham cracker crumbs (13.5 oz — or 14.4 oz box graham crackers blitzed into crumbs)
- 12 oz semi-sweet chocolate chips
- 12 oz butterscotch chips
- 1 can sweetened condensed milk (14 oz)
Instructions
- Preheat the oven to 375°F (~190°C). Line a 13×9 pan with foil and add the butter directly to the pan.
- Once the oven is preheated, place the pan in the oven and cook for around five minutes, until the butter is melted. Keep an eye on it to make sure the butter doesn’t burn!
- Remove the pan from the oven and add enough graham cracker crumbs to cover the bottom of the pan and absorb the butter. Pat until firm. You may see a few wet spots, but you want the butter absorbed with a mostly firm base.
- Sprinkle chocolate chips evenly across the graham cracker base.
- Sprinkle butterscotch chips evenly on top of the chocolate chips, filling in gaps where possible.
- Drizzle the sweetened condensed milk evenly over the top, especially around the edges. It will even out during baking, so don’t stress about making it perfect.
- Bake for 15-25 minutes, until bubbling and just starting to turn golden brown around the edges. Do not overbake, as the bars will firm up after baking.
- Cool at room temperature, then refrigerate before slicing for best results.
- Trim edges using a sharp knife, then cut into desired-size rectangles.
- Store in an airtight container at room temperature or in the refrigerator. Bring to room temperature before serving.
Notes
FAQs
Find answers to the most frequently asked questions below.
Can I use a different-sized pan?
Yes! Any pan size will work, although you may want to adjust the ingredients slightly. For example, if you use a 9×9, you may want to reduce the ingredients by roughly 25-30%. The same principle applies for a larger pan — you just need to make sure that there’s enough butter and graham cracker crumbs to form a firm base.
This is an eyeball recipe, so don’t worry about exact measurements. Generally, you’ll just have thinner or thicker bars depending on your pan size.
Can I make these bars ahead of time?
Yes! In fact, you’ll need to make these at least a few hours in advance, as they need to cool and set before cutting. I recommend baking the day or night before and then cutting and serving the following day.
How long will these bars last?
They’re honestly delicious for up to a week, but for maximum freshness, serve within 1–2 days.
How many bars does this recipe make?
That depends on how big you cut them. We like decadent desserts, so we usually go with 12-15 large bars, or 18-24 if you cut them smaller. This estimate accounts for trimming the edges, which we always do.
How do I store magic bars?
Before cutting, store them in an airtight container in the refrigerator, as they will hold together better when you cut them. After cutting, store in an airtight container at room temperature or in the fridge. Bring to room temperature before serving.
Can I freeze magic bars?
Yes! Freeze in an airtight container or Ziploc for best results. I recommend cutting them first. Let them thaw at room temperature before serving.
Love This Recipe? There’s More Where That Came From
These magic bars have been a go-to treat in our house for years, and I hope they become one of your favorites too. If you make them, I’d love to hear how they turn out — especially if you’re team no-nuts and no-coconut like we are.
If you’re into easy, crowd-pleasing desserts, don’t miss my Old-Fashioned Molasses Cookie recipe. They’re chewy, cozy, and just as simple to make.