
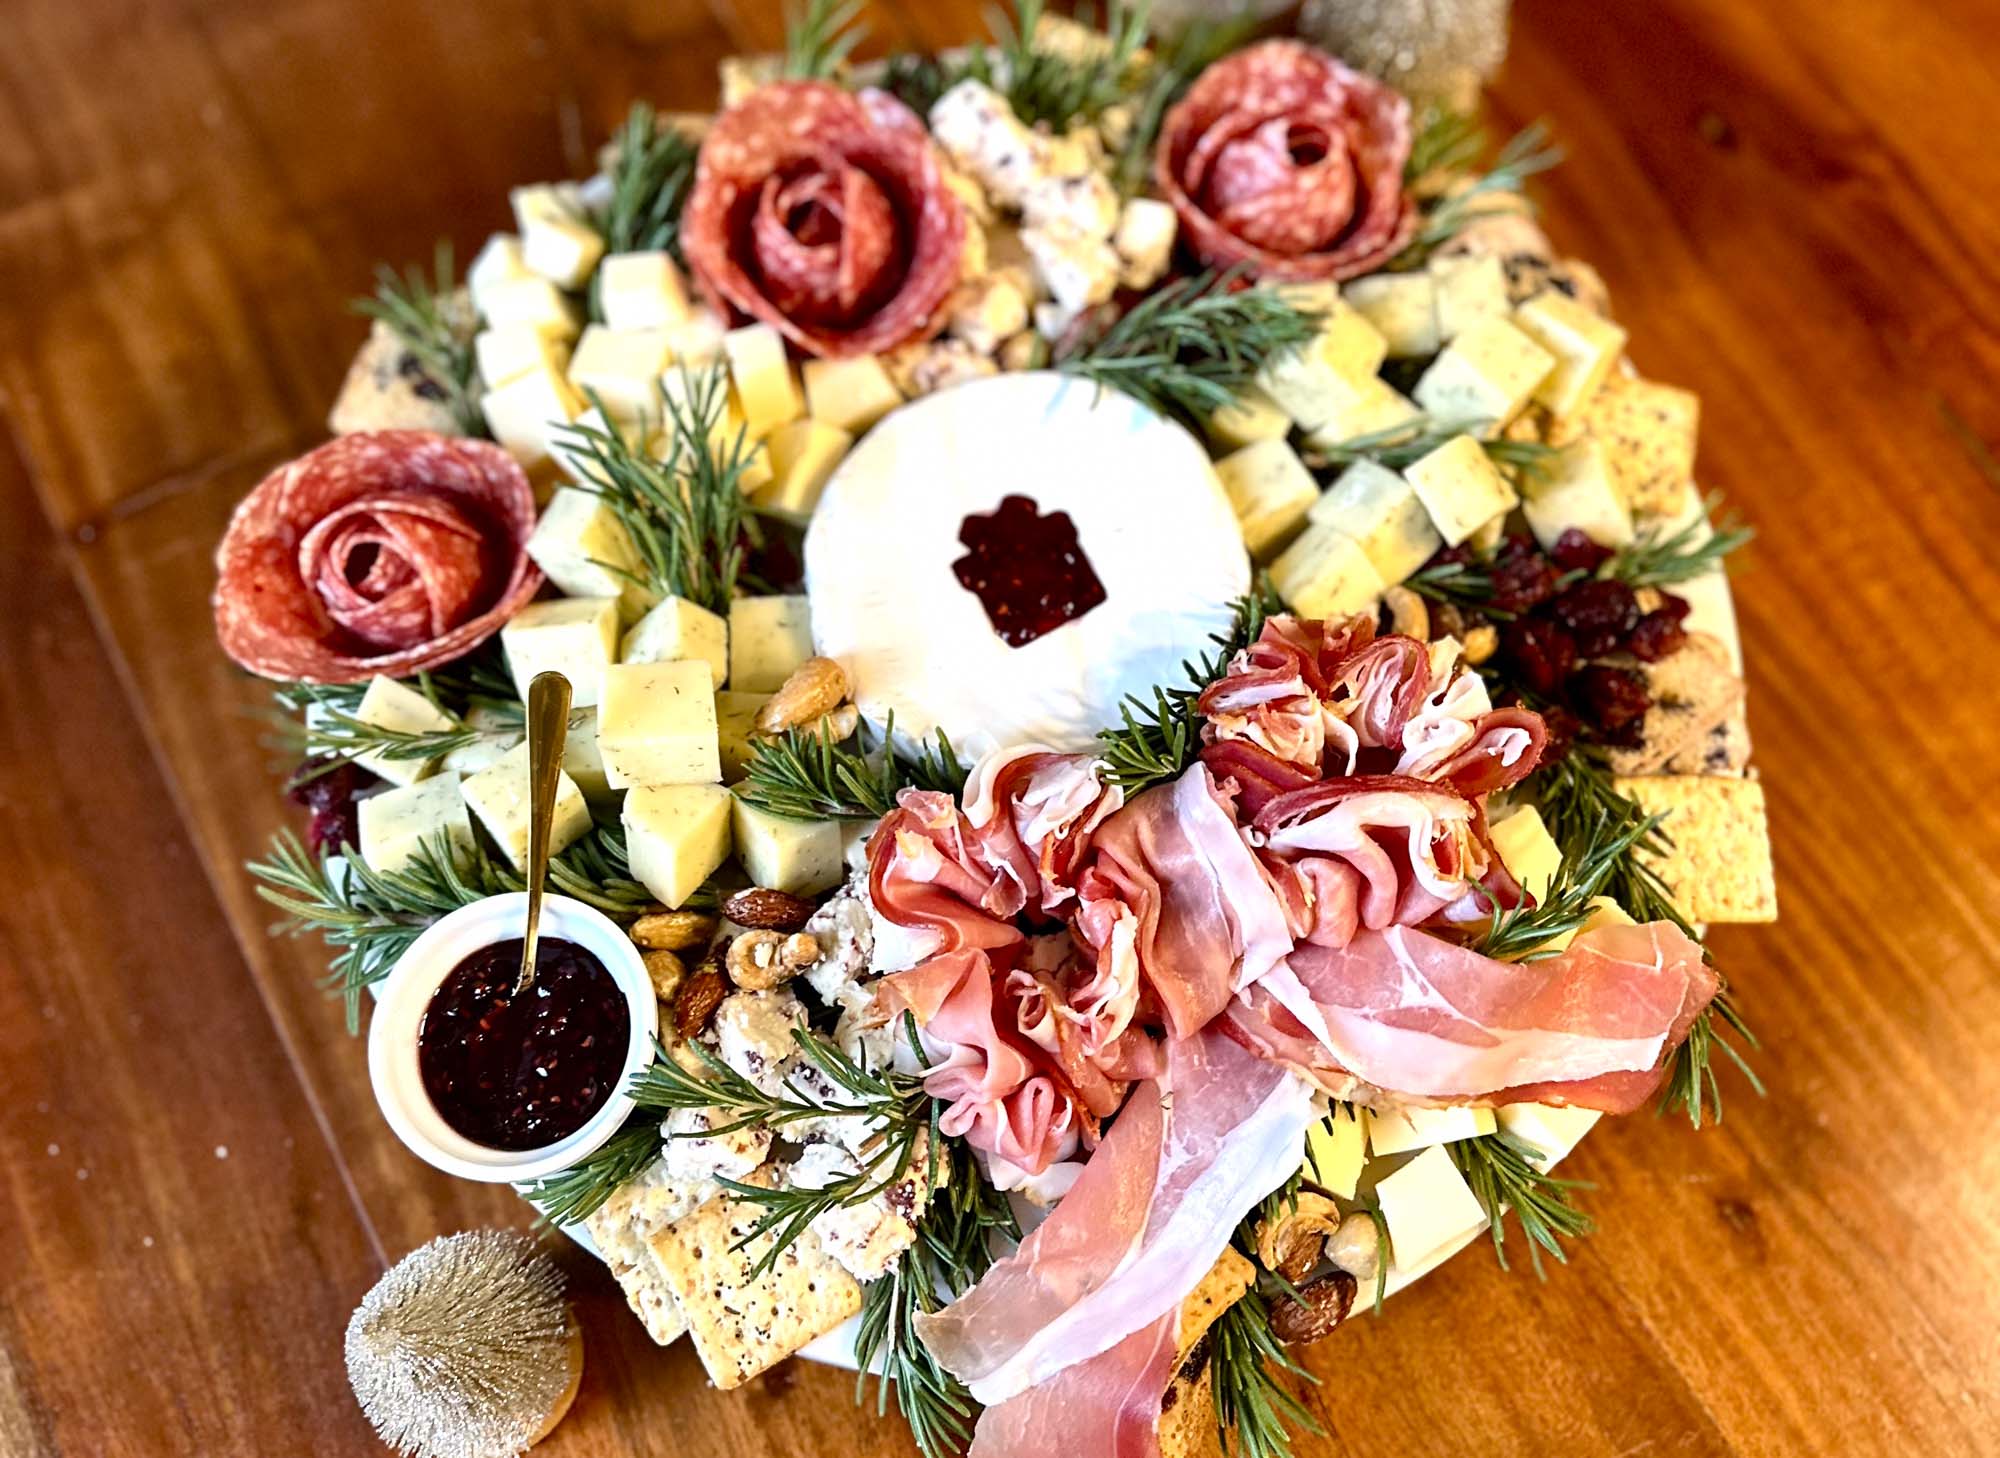
How to Assemble a Christmas Wreath Charcuterie Board
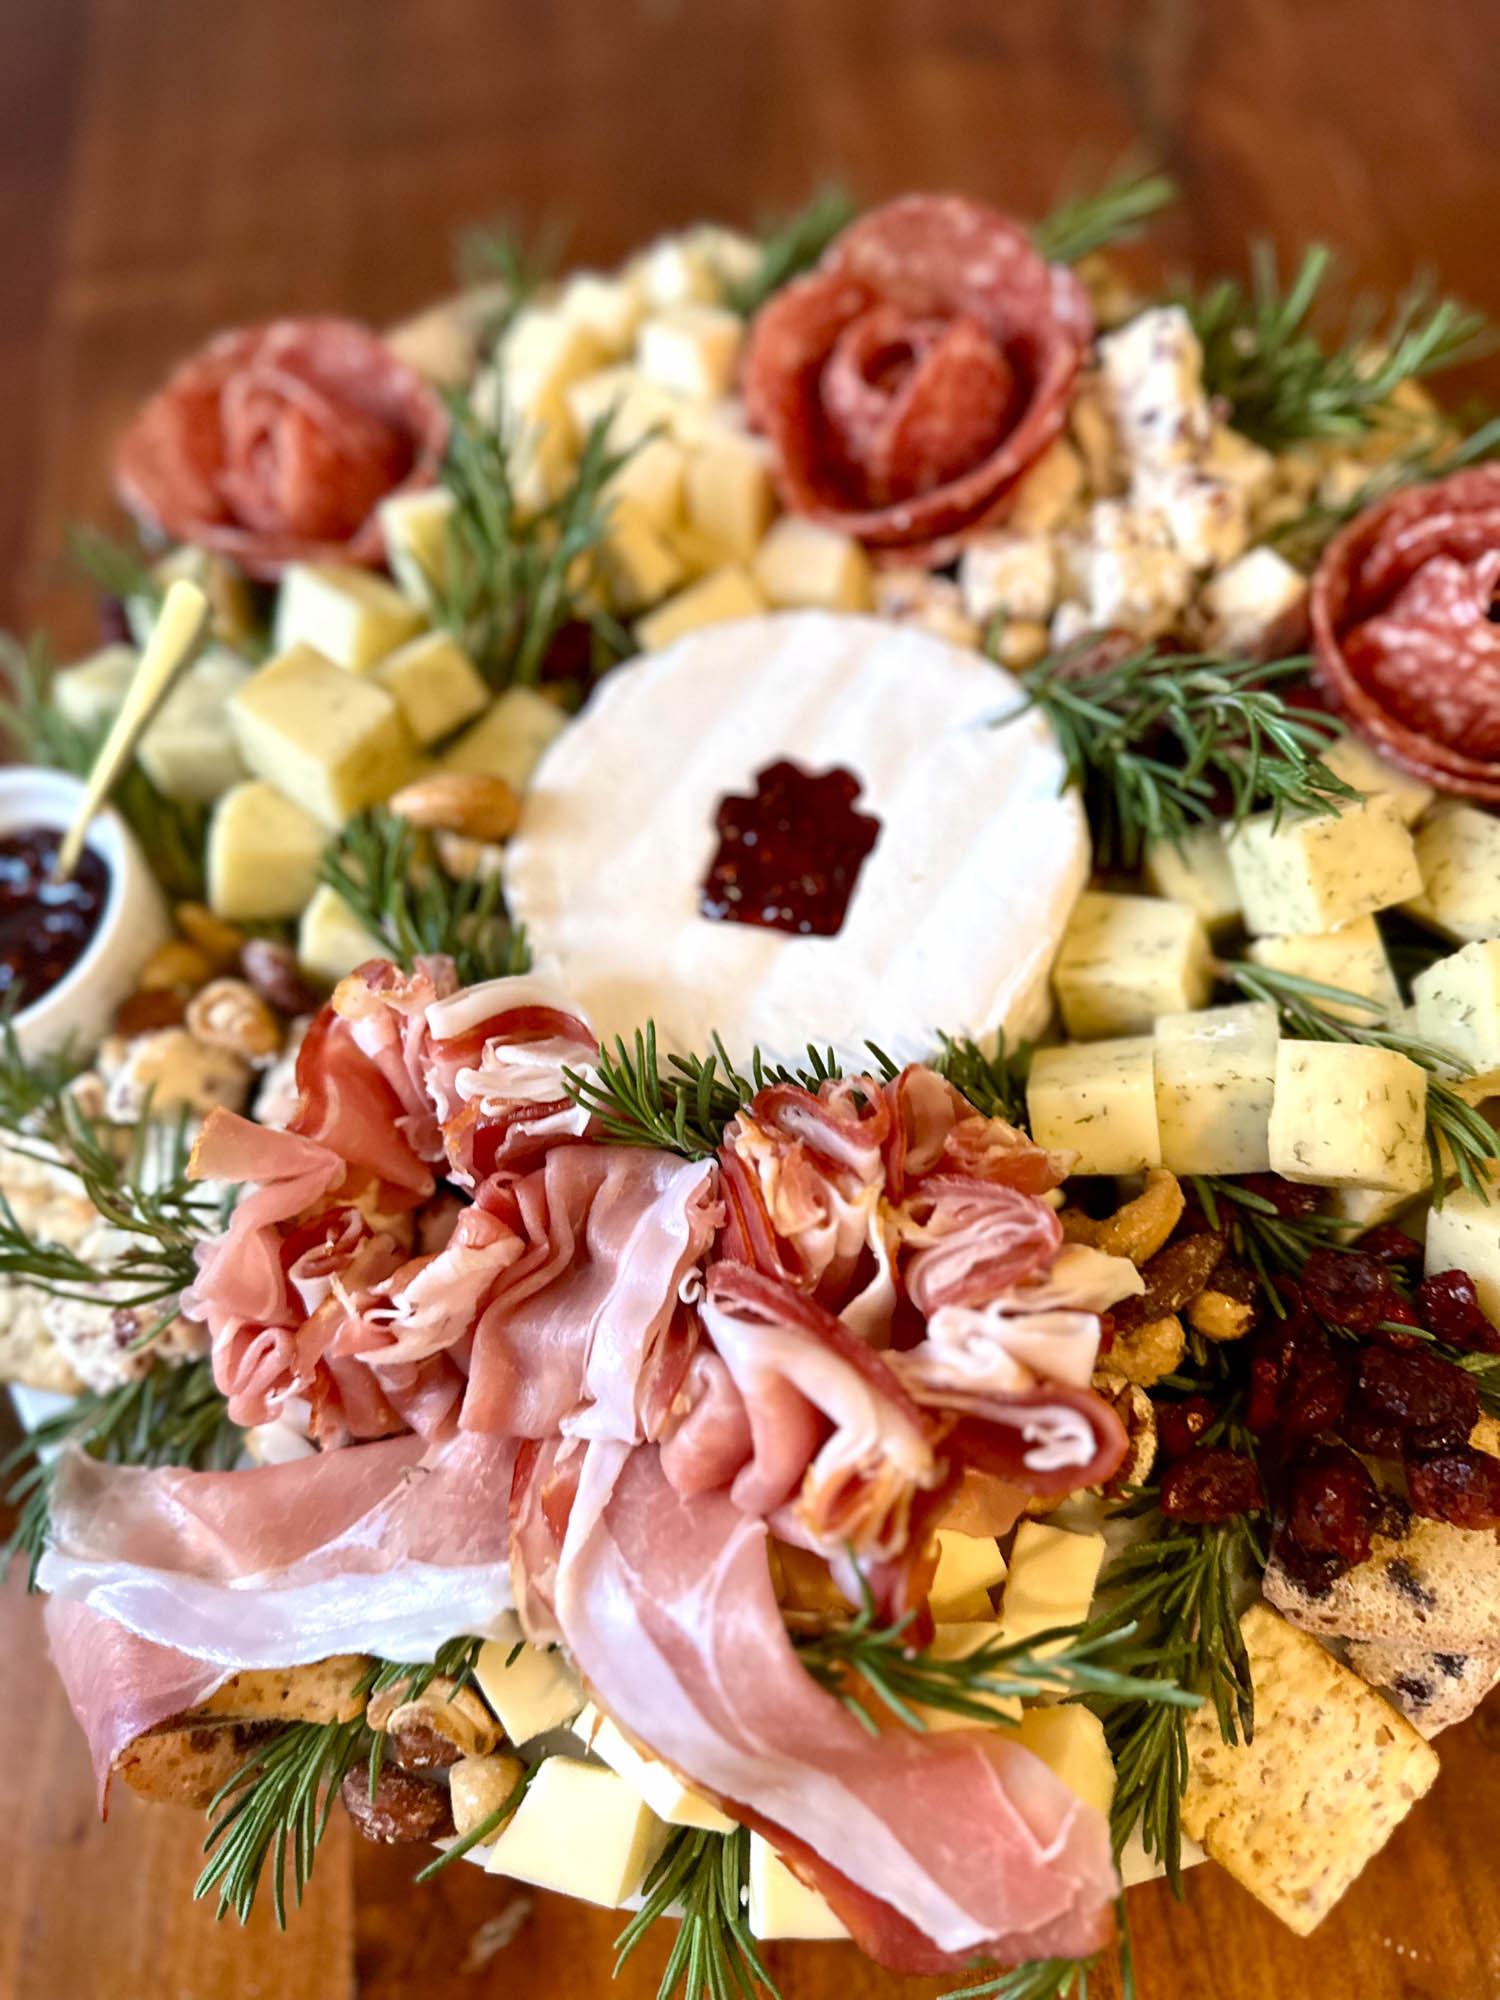
Gorgeous, elegant, and easy to throw together — charcuterie is one of my favorite party tricks. And since the holidays are the perfect time to bring out this crowd-pleasing appetizer, I’m showing you how to assemble a Christmas wreath charcuterie board.
Christmas is one of the busiest times of year, so I’m keeping it simple with one festive yet refined board: a charcuterie wreath that’s both effortless and eye-catching.
It comes together quickly but still feels like a showstopper, guaranteed to impress your guests.
This post contains affiliate links that earn me a commission. For more information, read my disclaimer.
Christmas Charcuterie Wreath Board Supplies & Equipment
As I mentioned in my charcuterie template guide, there should always be a few key elements in any board — a mix of hard and soft cheeses, a couple of spreads or jams, multiple types of meats and crackers, and a variety of fruit, dried fruit, and nuts.
For a Christmas wreath charcuterie board, you can use the same basic formula, but presentation matters even more. To get the signature wreath look, you’ll need a few specific ingredients and tools.
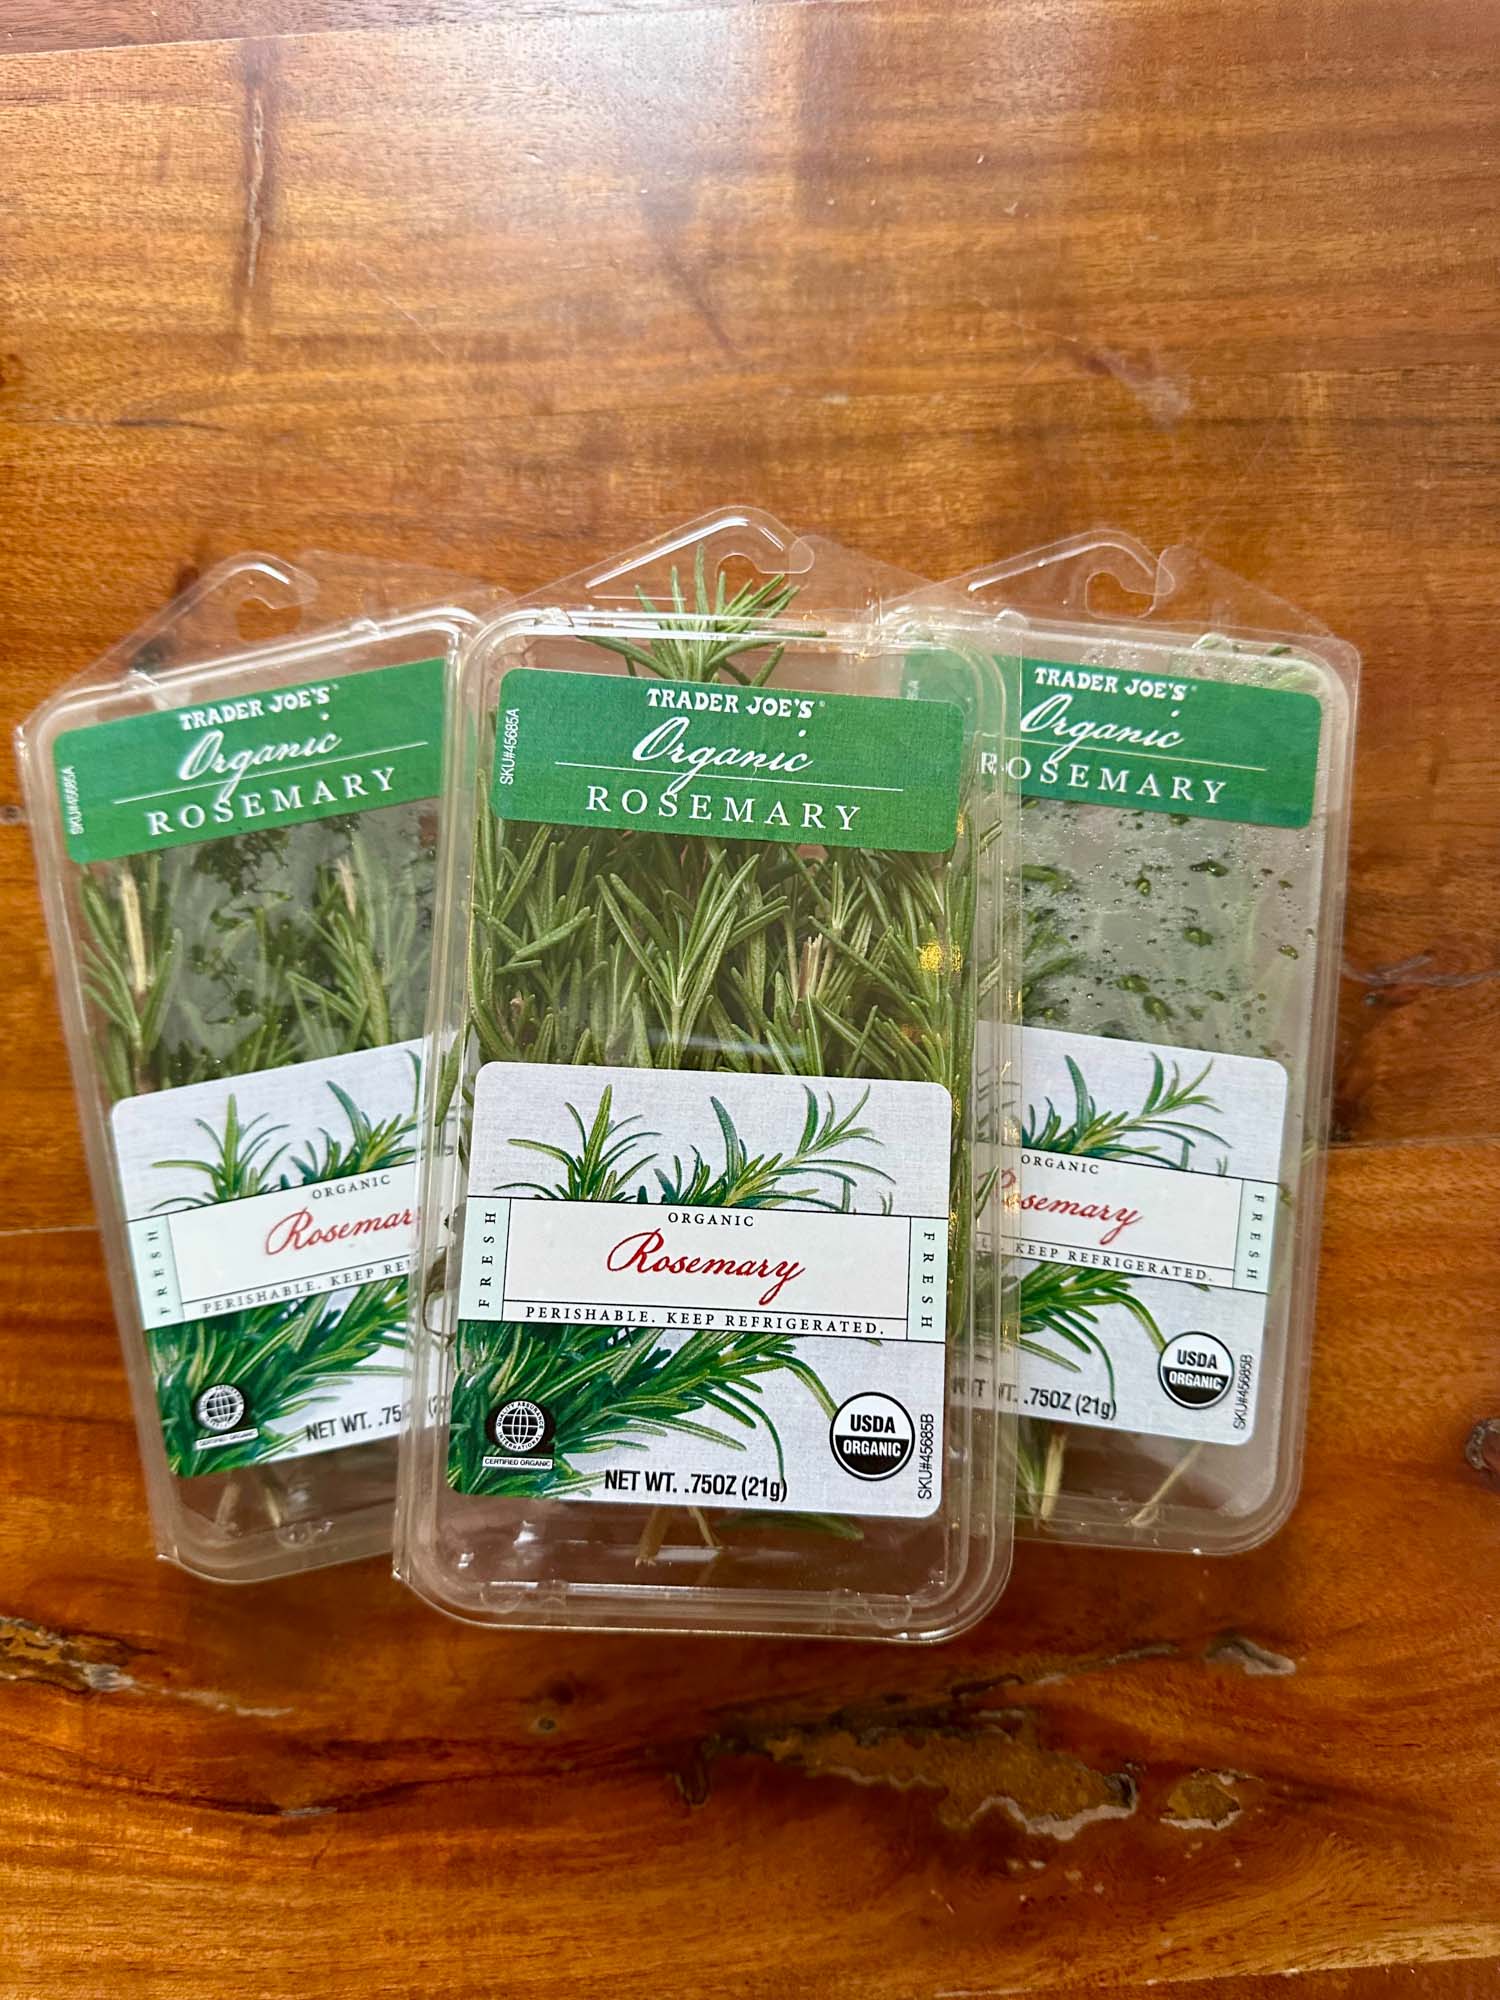
First, you’ll need an abundance of rosemary sprigs. This is a necessity to add the greenery of the wreath! I used three .75 oz packages from Trader Joe’s.
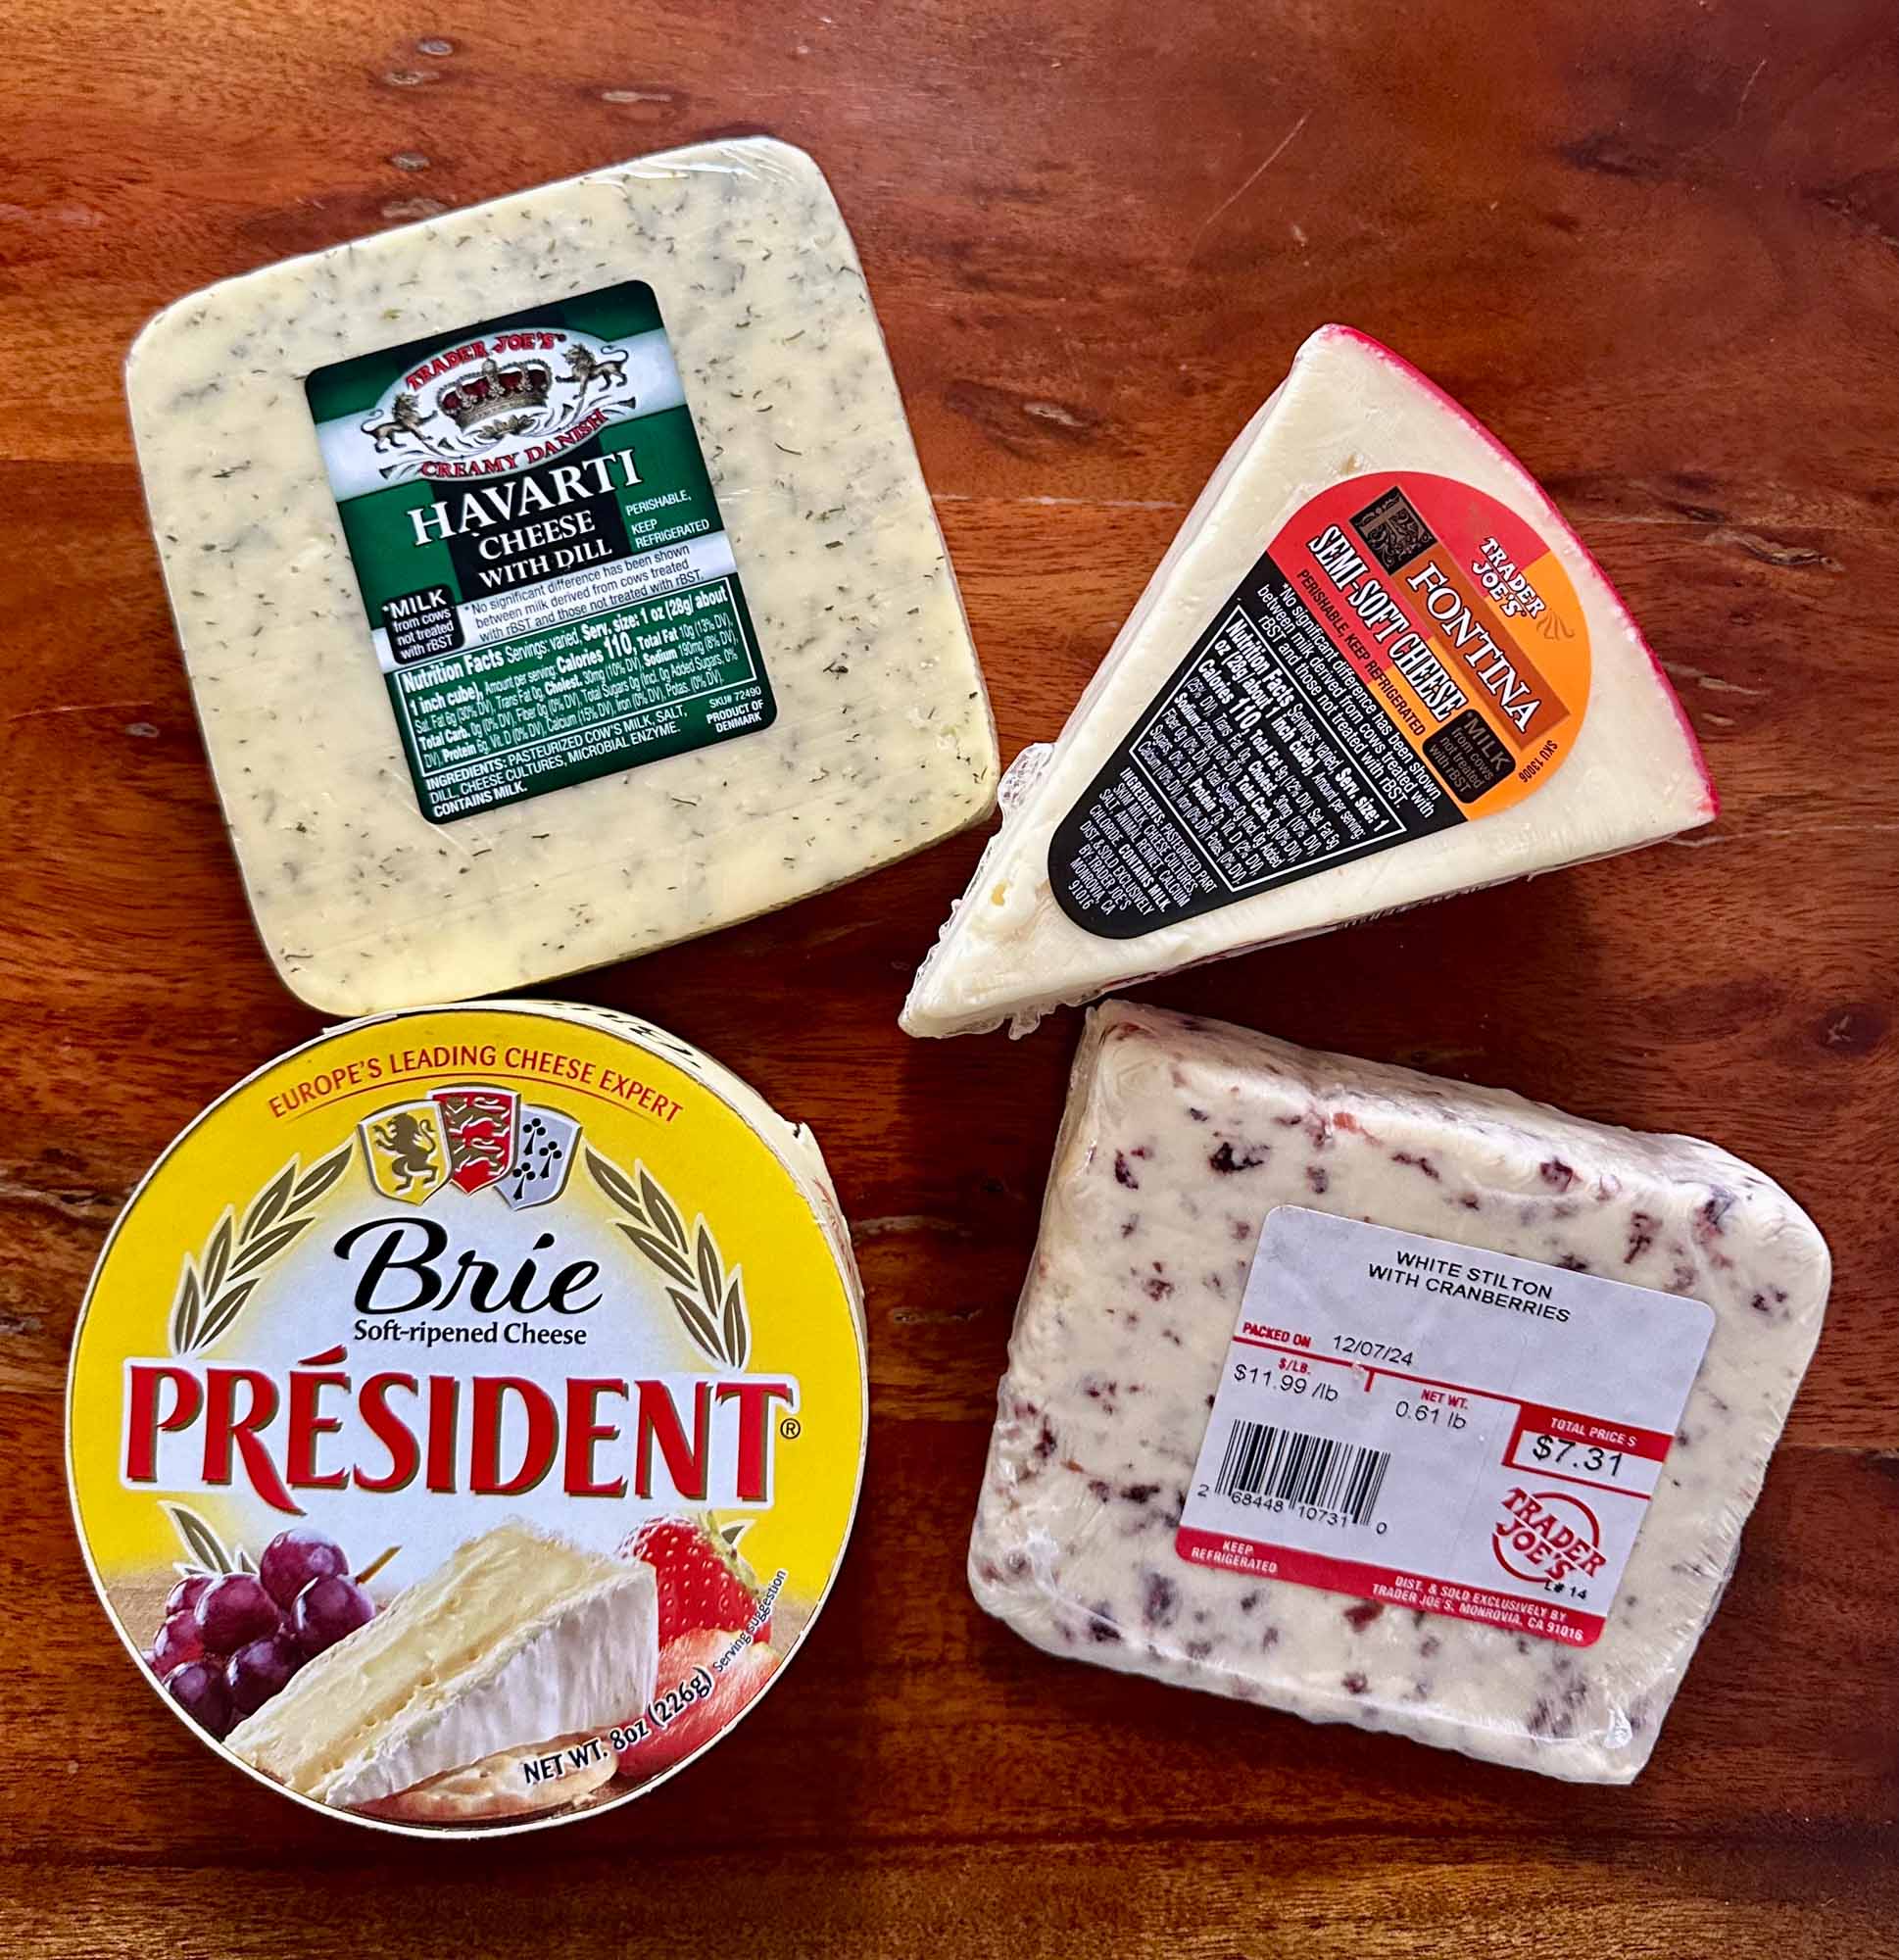
While I usually include both hard and soft cheeses, I recommend sticking to harder cheeses for this layout (with the optional brie wheel in the center). Chopping all the cheeses into small, consistent cubes helps the board look uniform and structured.
Finally, use both salami and prosciutto if you want to recreate the salami roses and prosciutto bow featured on my wreath. Those details make the design feel extra festive without adding much effort.
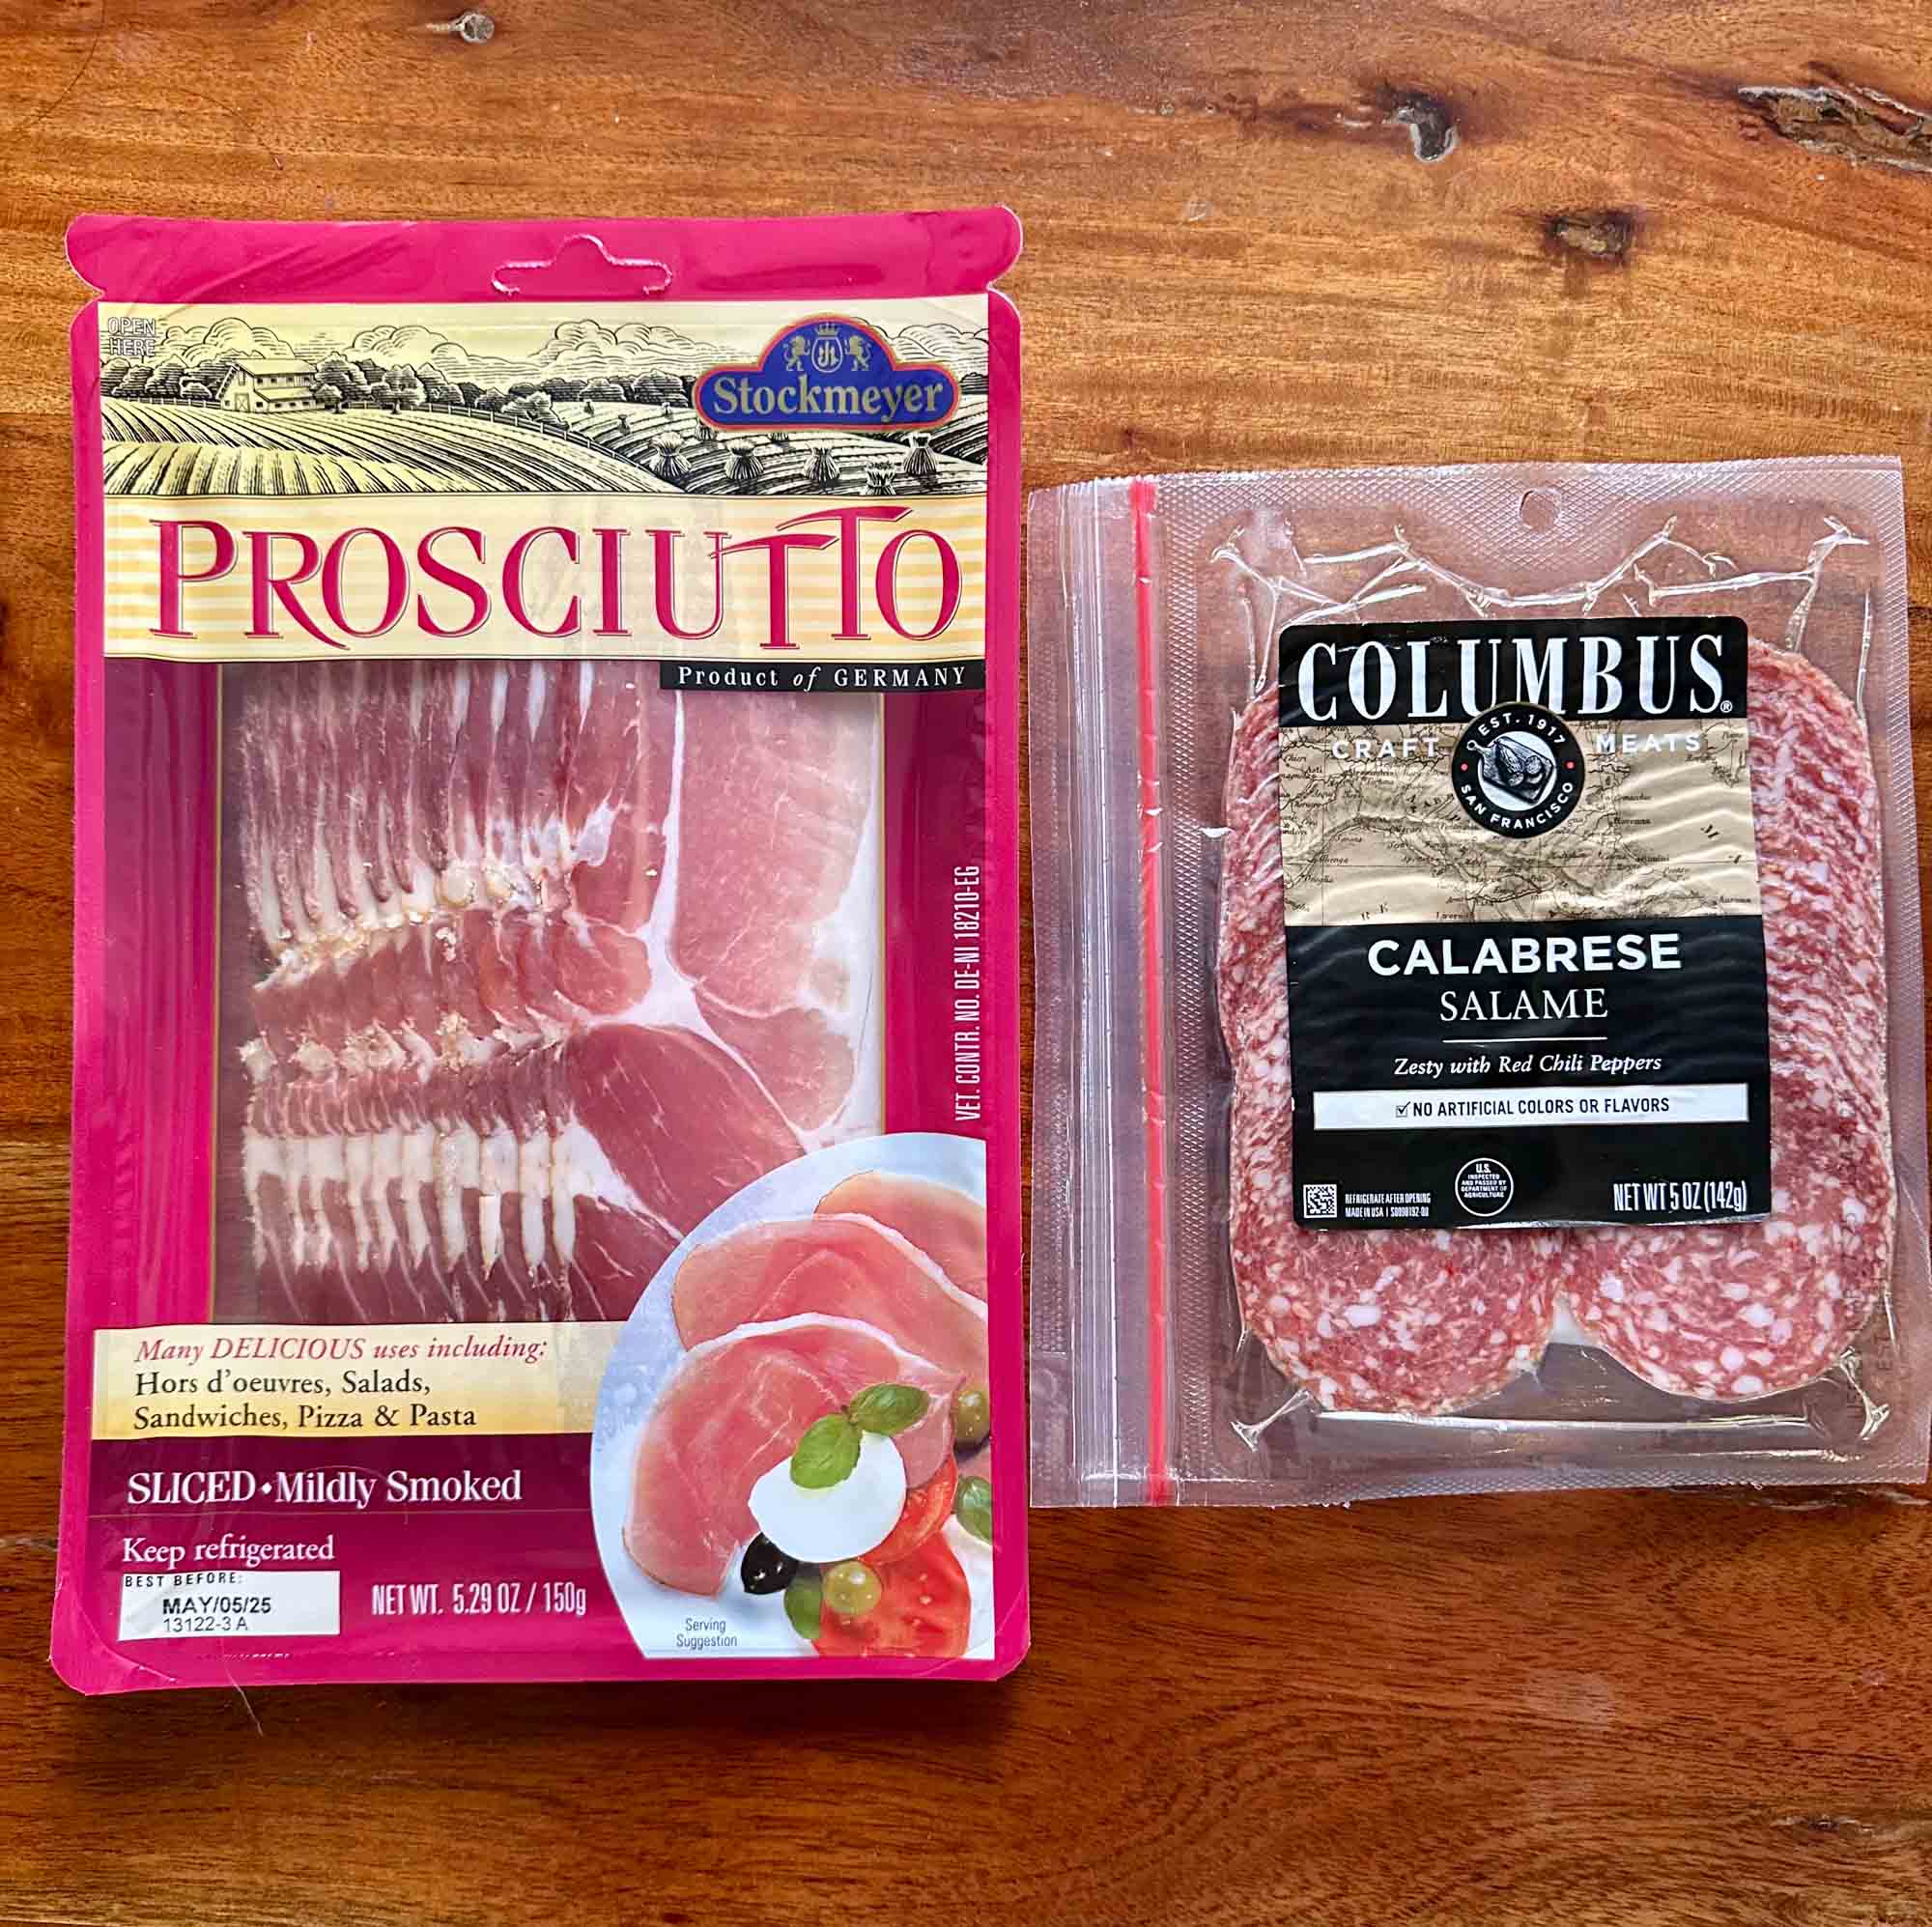
These are the most important elements for making a charcuterie wreath. Beyond that, the ingredients are flexible. As long as you can arrange them into a circular shape, it will look beautifully intentional.
Supplies
Here’s everything I used to create my Christmas charcuterie board wreath.
- Rosemary sprigs: about three 0.75 oz packages (I picked mine up at Trader Joe’s)
- 3+ hard cheeses: I used fontina, white stilton with cranberries, and Havarti with dill
- Salami: at least 5 oz
- Prosciutto: one large pack (around 5.3 oz)
- Crackers: one or two varieties — I used Trader Joe’s Stollen Crisps and Everything But the Bagel Crackers
- Fruit, dried fruit, and nuts: I used dried cranberries and Trader Joe’s Nuts about Rosemary Mix)
- Brie wheel (optional): plus a mini Christmas cookie cutter for a festive touch (mine’s from Michael’s, but similar sets are on Amazon)
- Dip or spread (optional): I used raspberry jam, but cranberry relish or jelly would be equally festive
A quick styling note:
In my Thanksgiving charcuterie post, I talked about the importance of choosing a color palette, and the same applies here.
For my Christmas charcuterie board wreath, I leaned into traditional reds and greens, but you can easily branch out. Whatever colors you choose, keeping your palette consistent helps the wreath look polished and intentional.
Equipment
Apart from the ingredients, you don’t need much to assemble a Christmas charcuterie wreath board — just a few basics.
A circular charcuterie board works best for achieving that wreath shape. If you don’t have one, you can improvise: I used my marble lazy Susan, and it was perfect.
You could also use a platter or charger in a pinch, but it’s best if the surface is completely flat for easy arranging.
If you’re adding dips, include one or two small ramekins with mini spoons. If you plan to place a Brie wheel in the center, you’ll also want a cheese knife. And mini forks are great for serving — mine are from Amazon, and I love them!
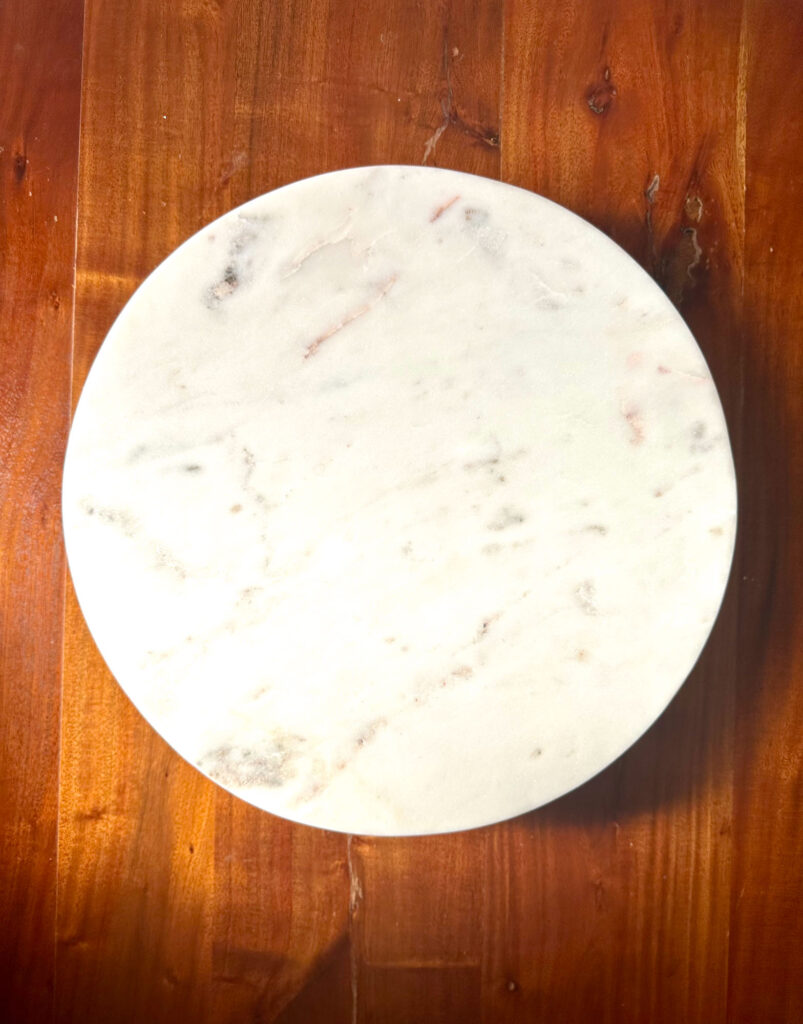
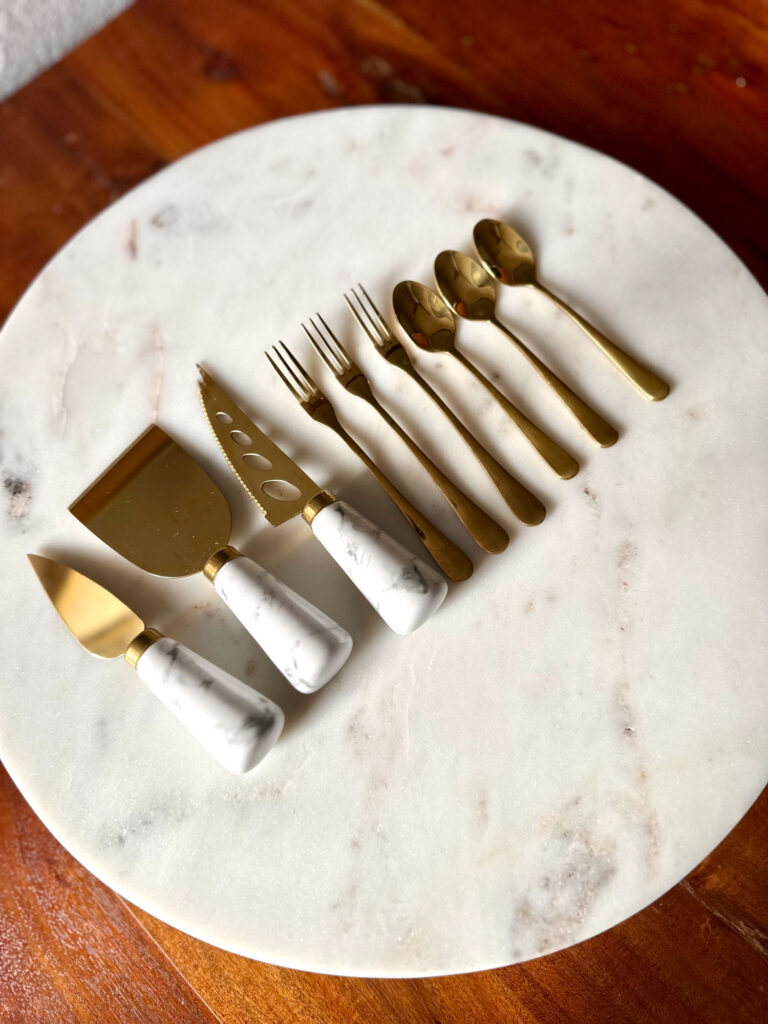
If you’re adding dips, include one or two small ramekins. If you plan to place a Brie wheel in the center, you’ll also want a cheese knife. And mini utensils are great for serving — mine are from Amazon, and I love them!
Step-by-Step Guide: How to Assemble a Christmas Wreath Charcuterie Board
Now that we’ve gone over supplies and equipment, let’s walk through how to assemble a charcuterie wreath step-by-step.
1. Create Your Wreath Framework
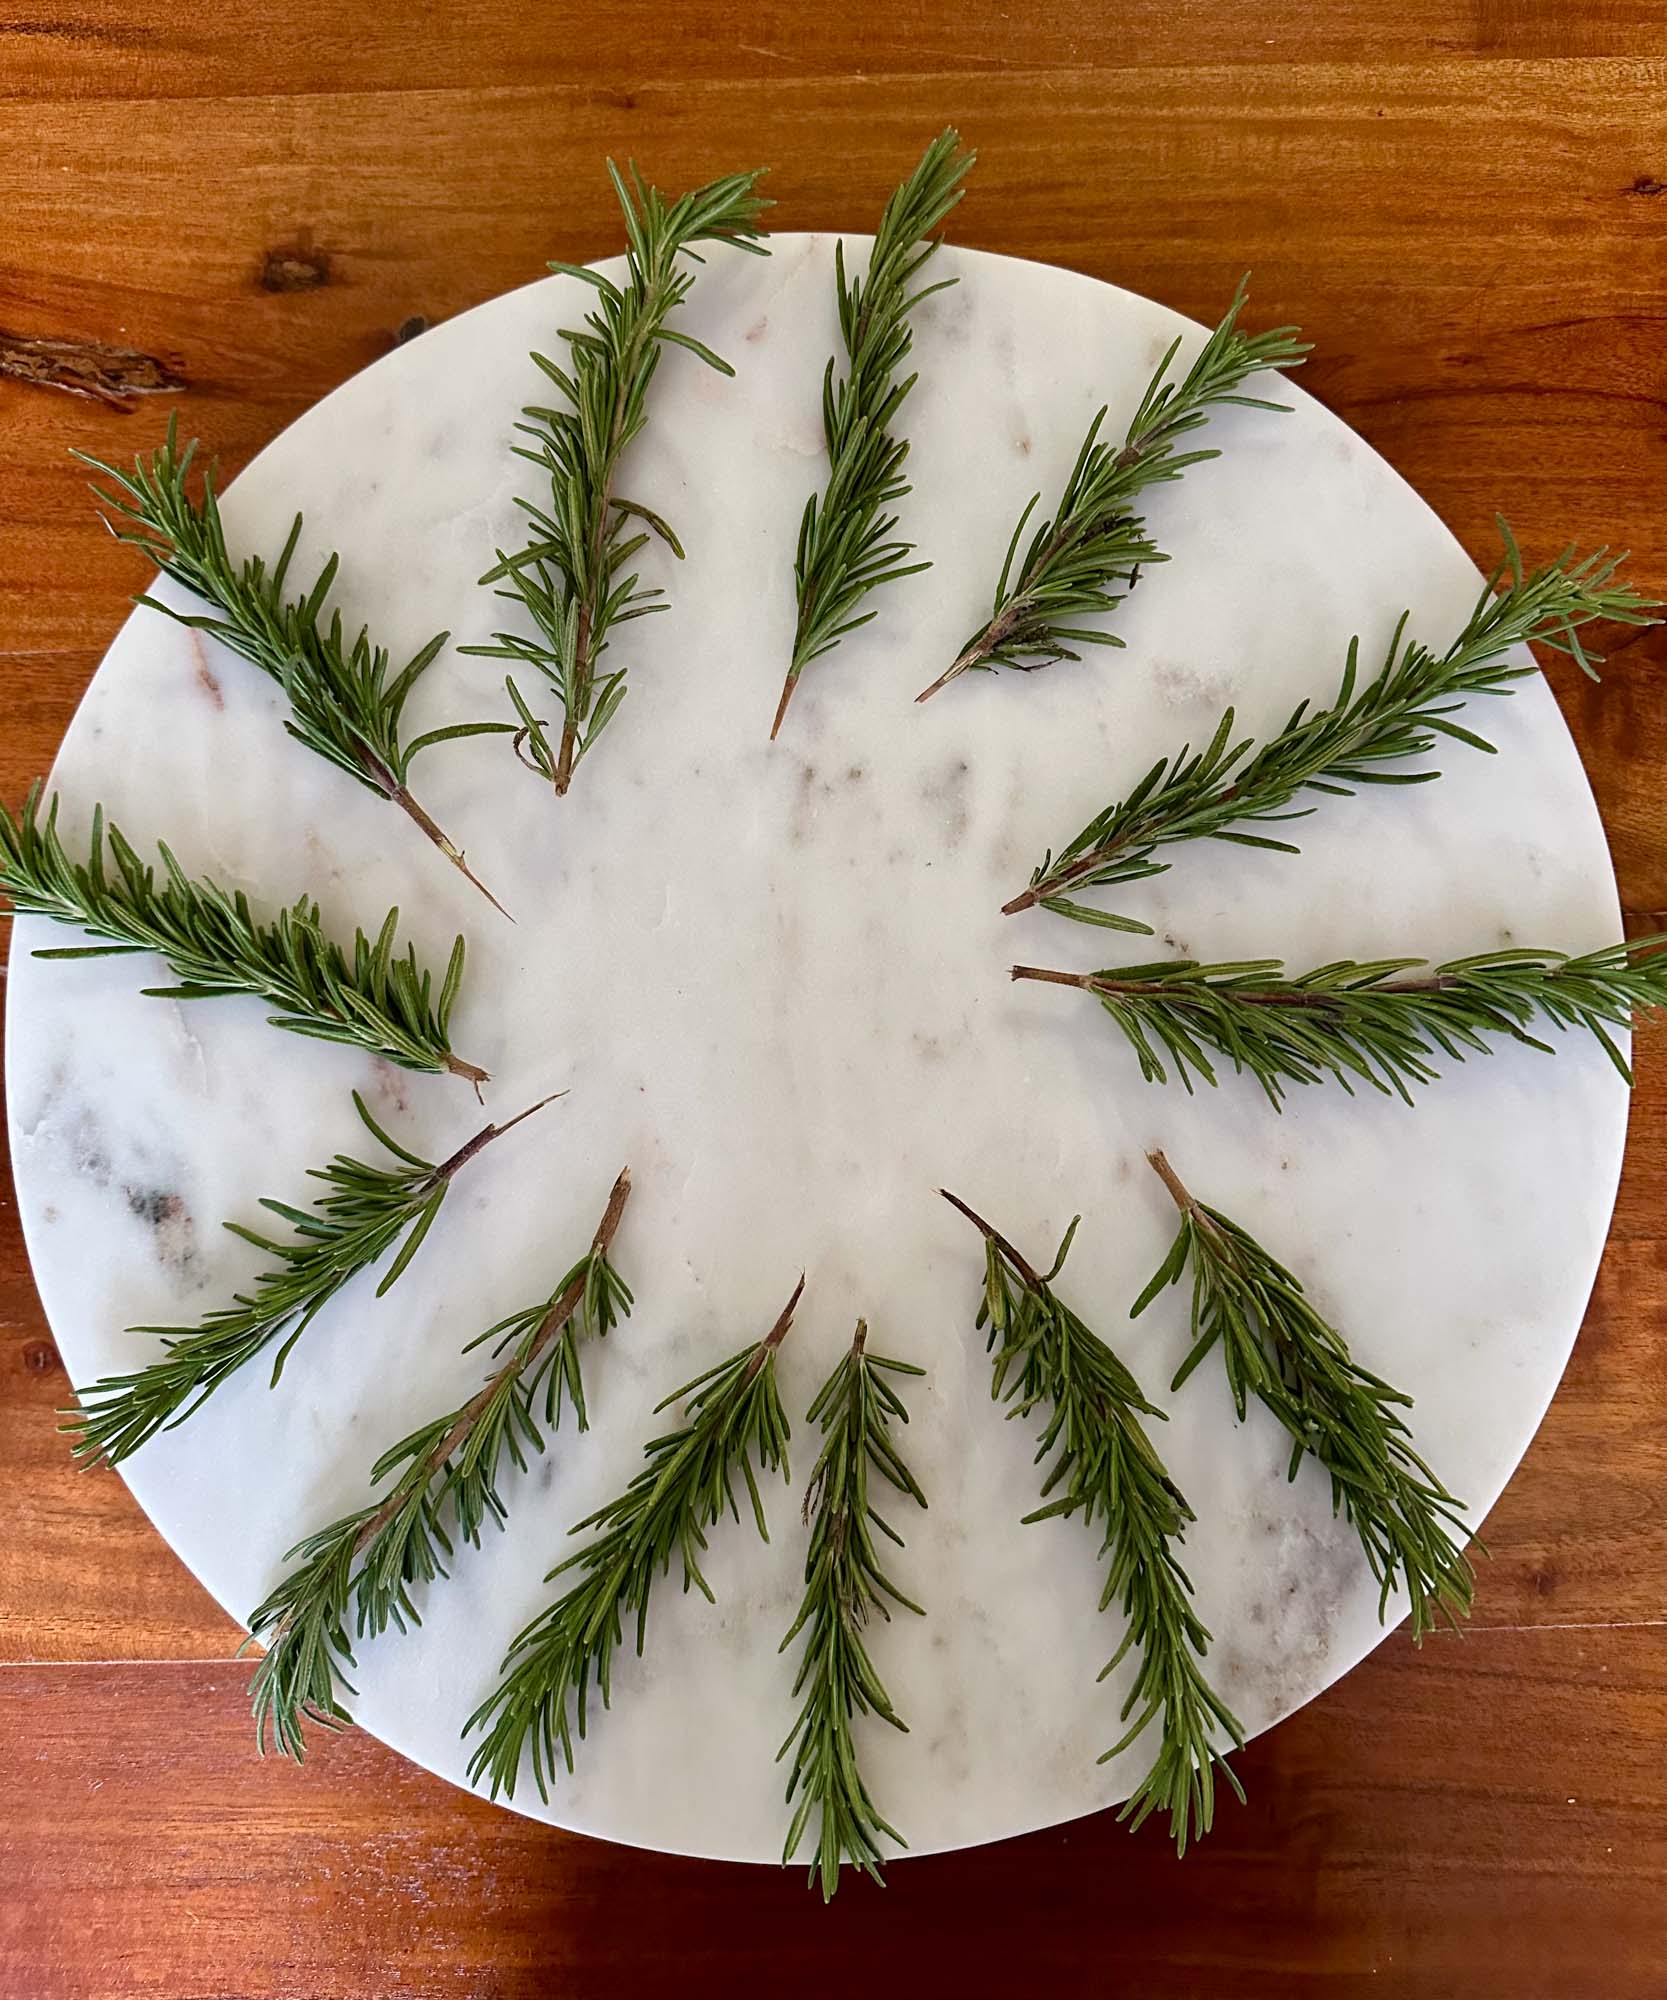
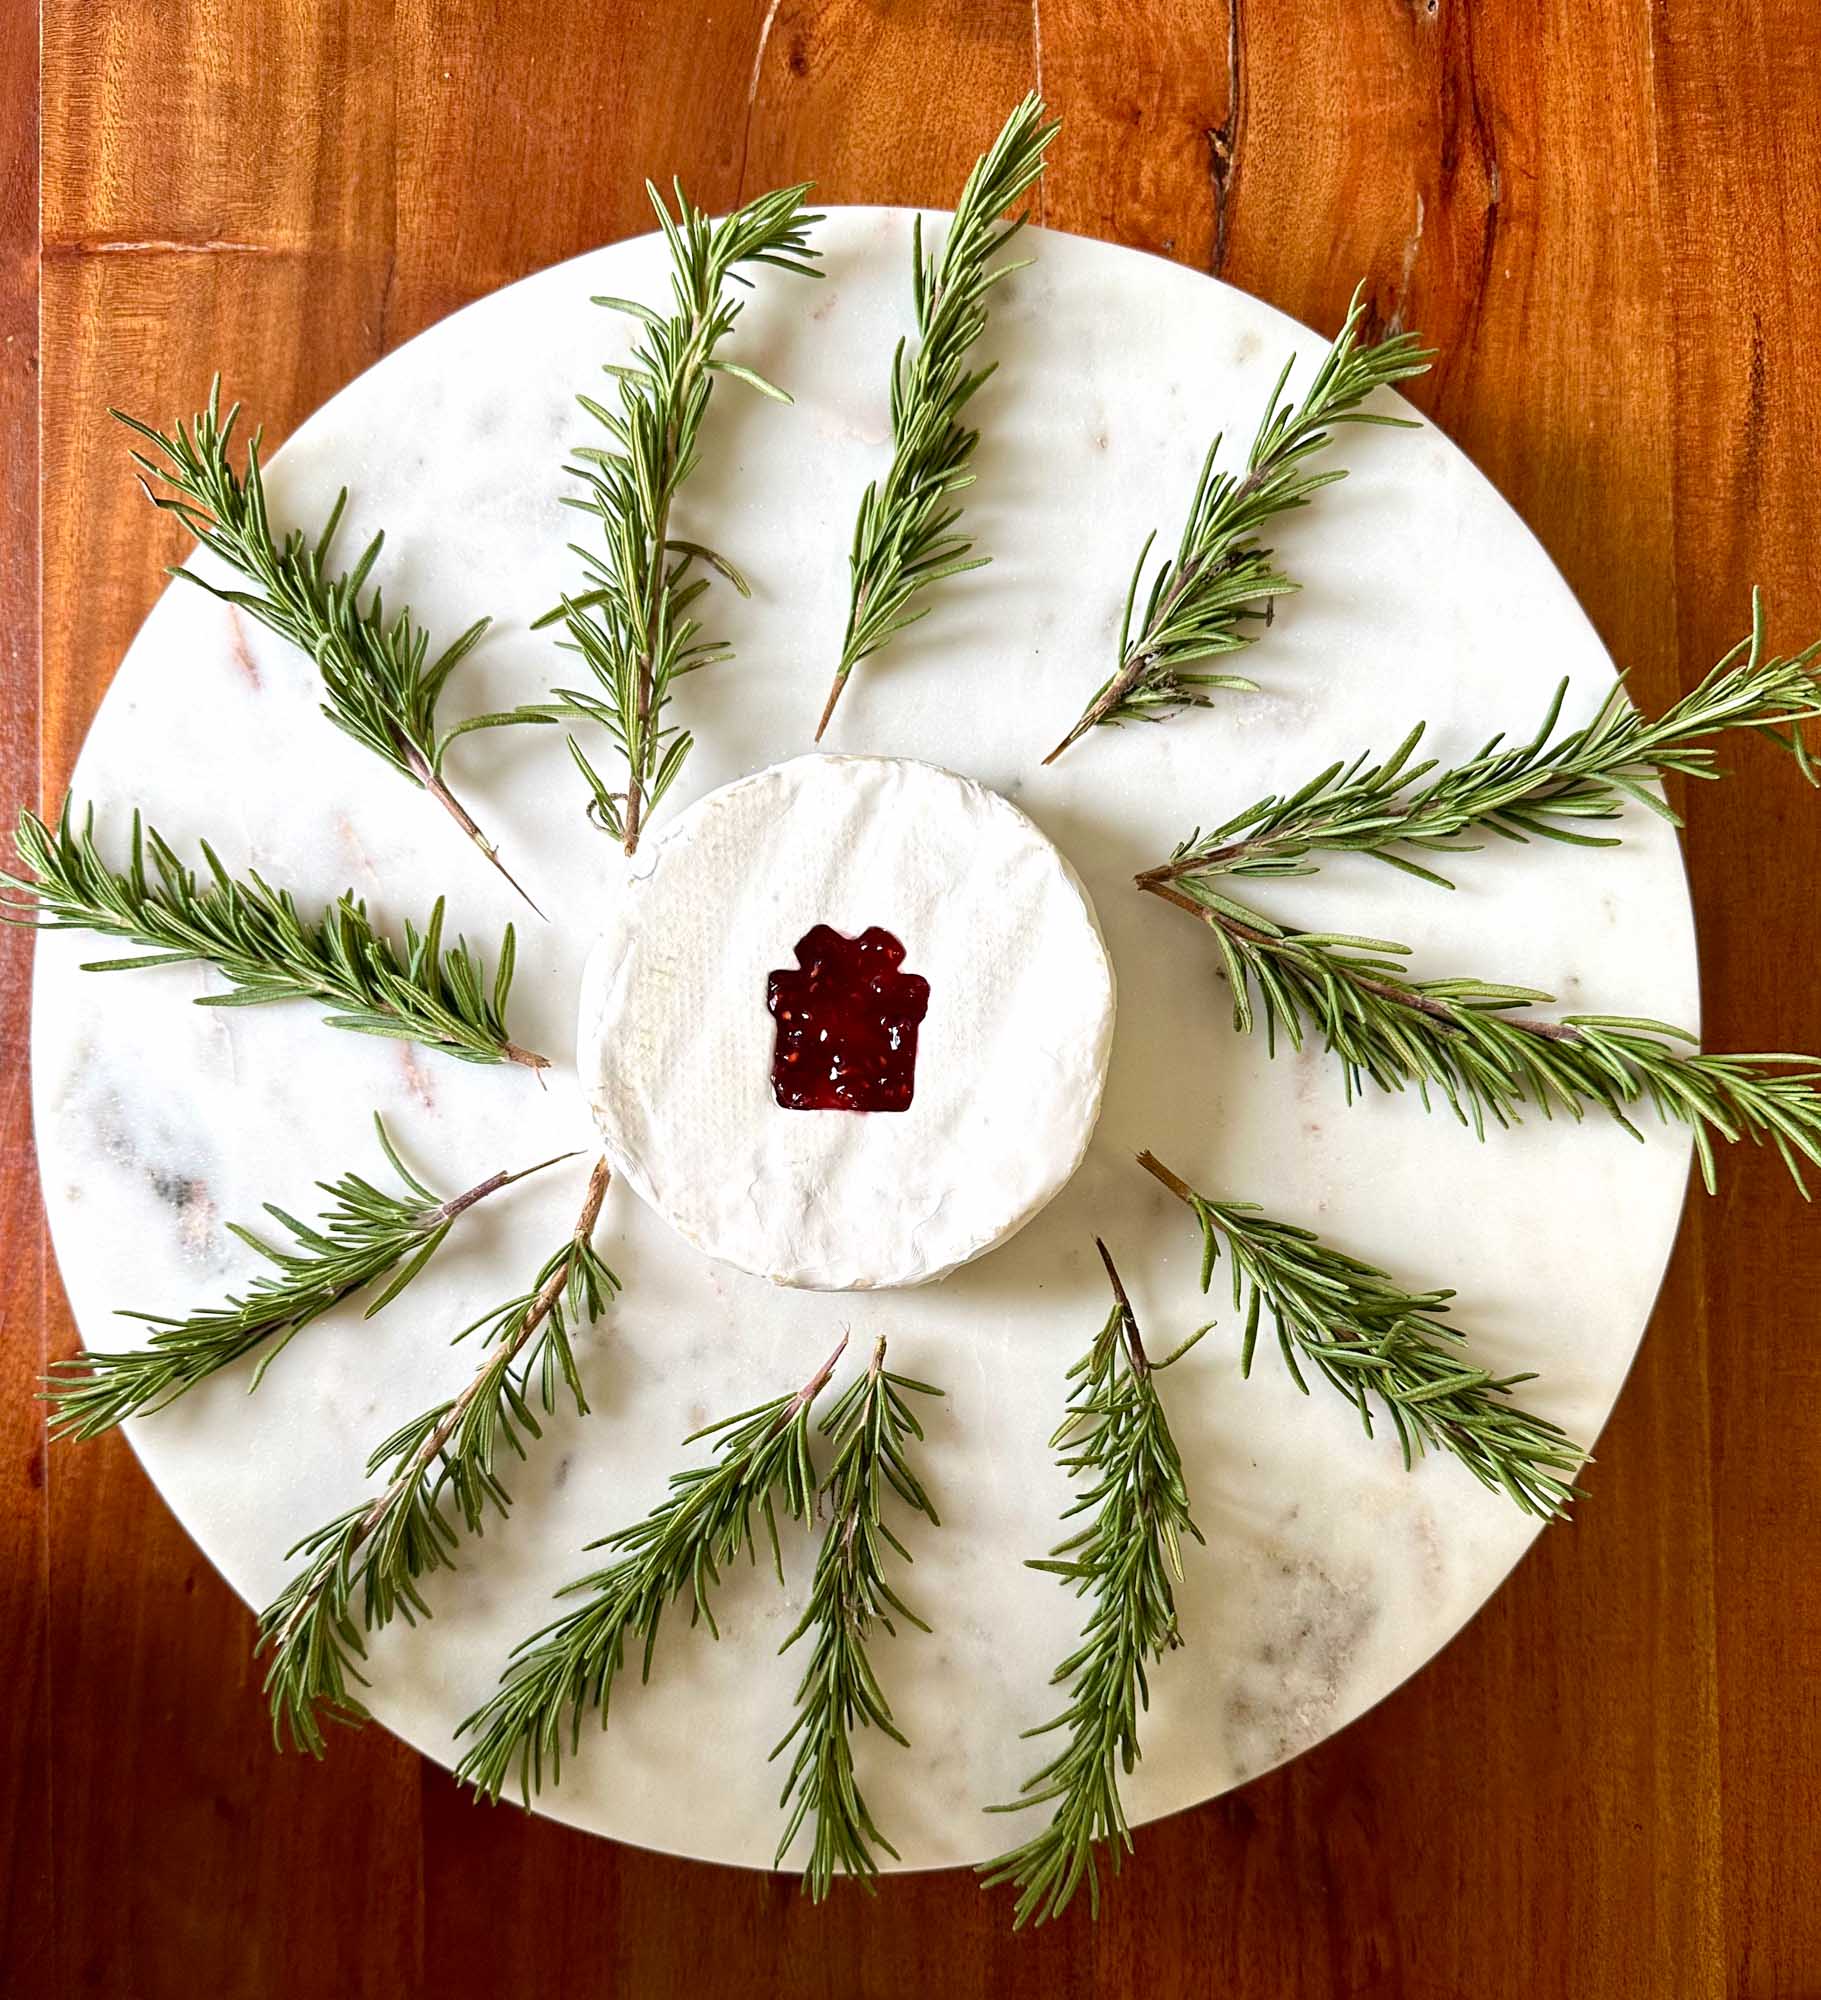
Take your rosemary sprigs and lay them down in a circular wreath shape around the edge of the board. I positioned mine at a slight angle, a couple of inches apart, to make the greenery look more natural.
Be sure to save a few rosemary sprigs for the end — you’ll use them to fill in any gaps and make the wreath look fuller.
2. Place Your Cheeses
If you’re using a Brie wheel, now’s the time to position it in the center of your Christmas wreath charcuterie board. For a little extra flair, I added a Brie cutout — it’s such an easy way to add a wow factor without extra effort.
To make a brie cutout, use a mini cookie cutter to remove a small section of the rind, then fill the space with a jam or spread. It’s simple but takes a little practice, so refer to my instructions from my previous post if you need a visual guide.
Once you’ve placed the Brie wheel, chop all of your hard cheeses into roughly 1-inch cubes and cluster them around the Christmas wreath charcuterie board.
I usually like my boards to be a bit asymmetrical, since it keeps things visually interesting. But for a charcuterie wreath, symmetry works best with the circular shape.
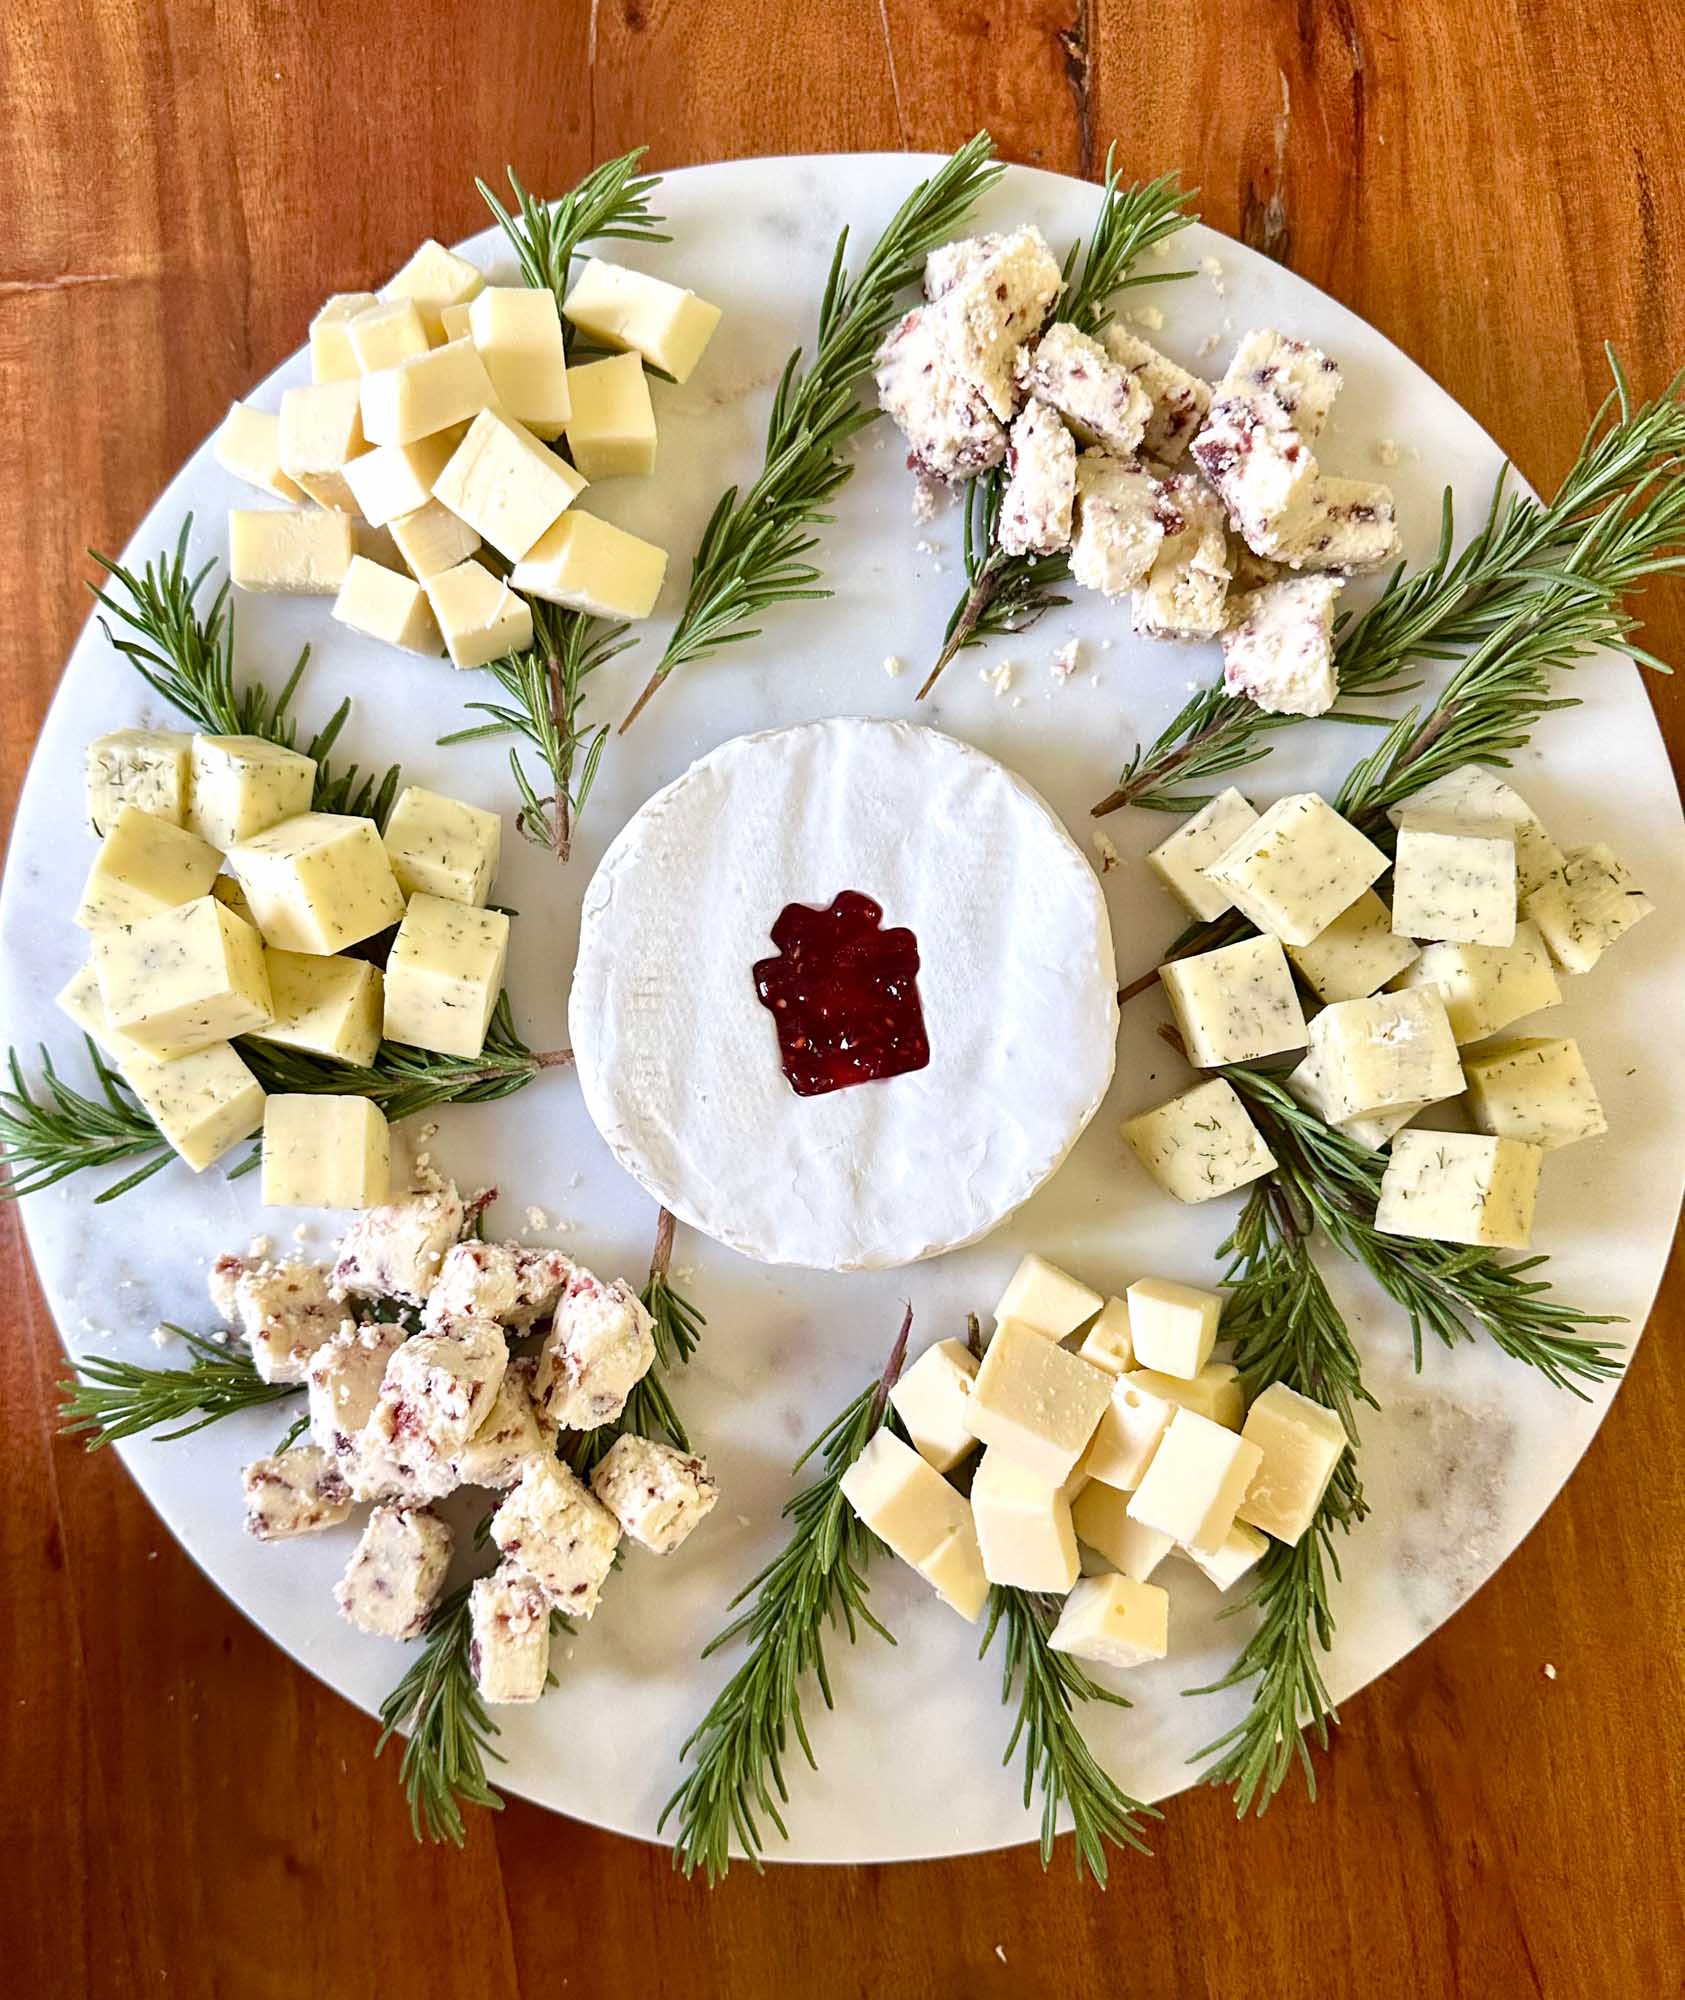
Do whatever looks good to you, just make sure the cheeses at the bottom aren’t stacked too high since you’ll be adding a bow on top at the end.
3. Add Dips and Salami Roses
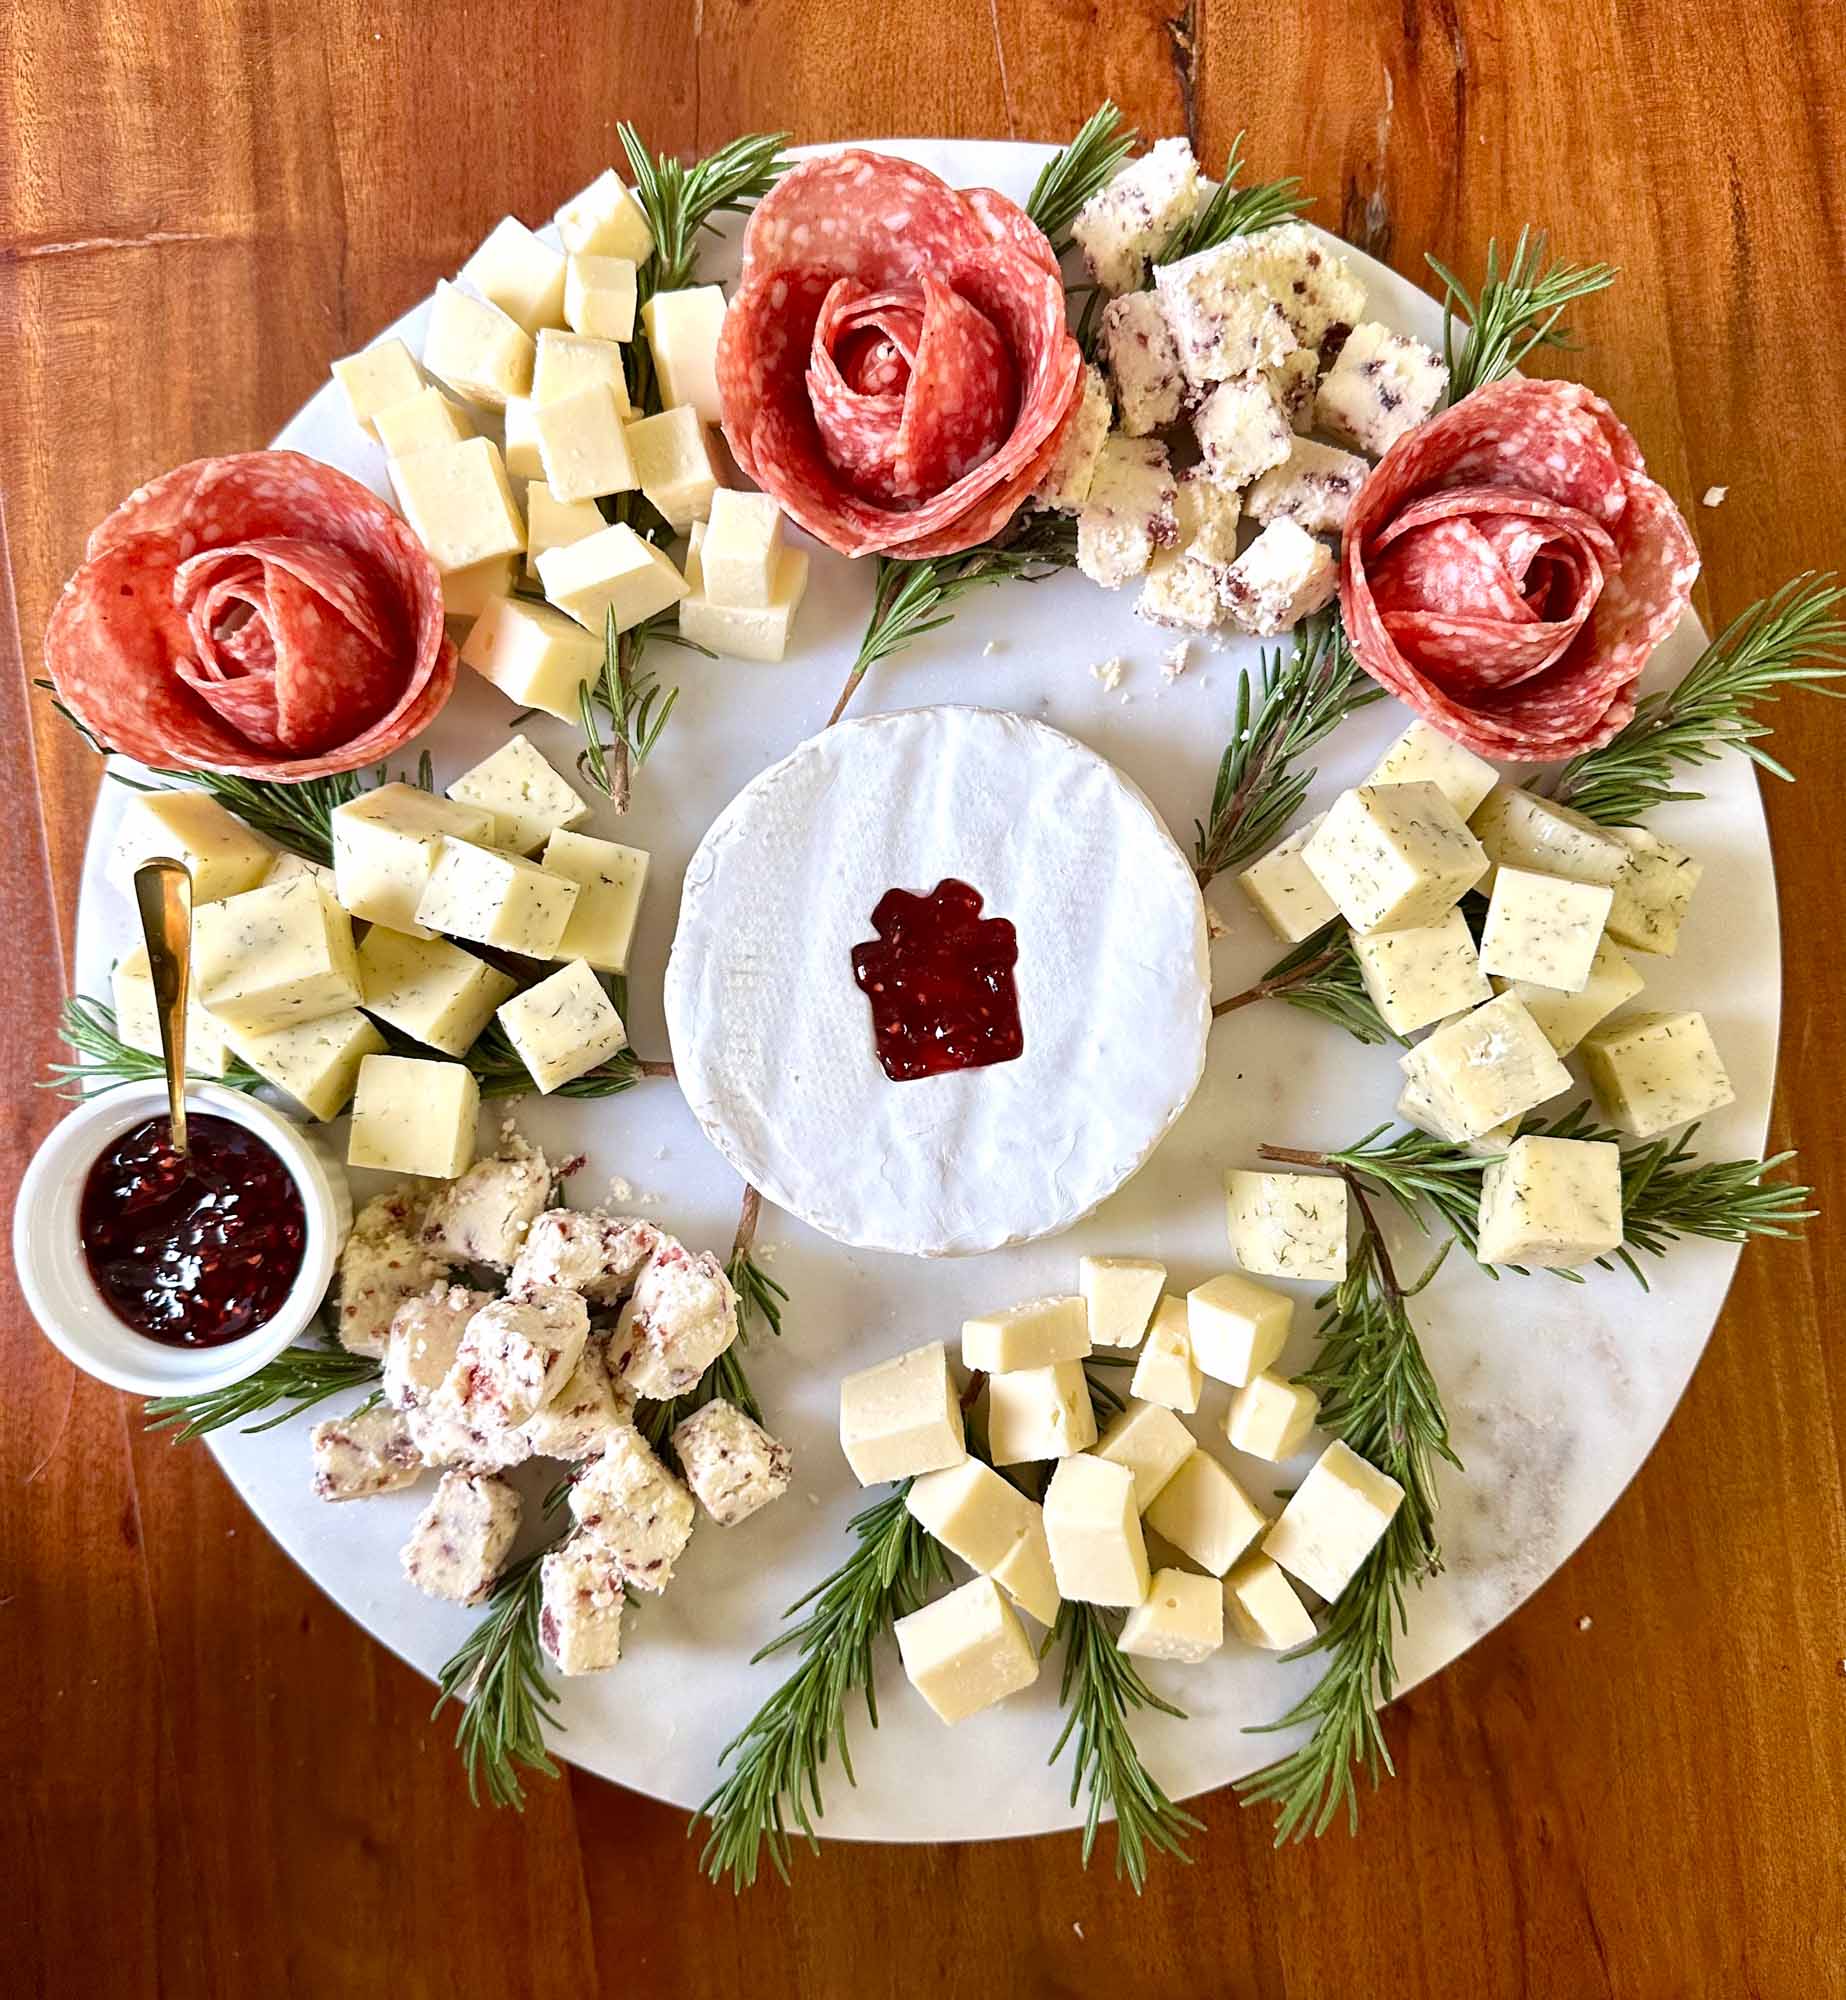
If you’re including dips, add them to one or two mini ramekins on your charcuterie wreath. I only had room for one, but even a small dish adds a nice pop of color and texture.
Next, form your salami roses by layering slices around the mouth of a champagne flute, then invert it onto the board (see my previous instructions if you need a refresher).
I arranged three roses around the top of the wreath, but you can add more. Just make sure there’s enough space and balance between them.
4. Fill Any Gaps in Your Wreath
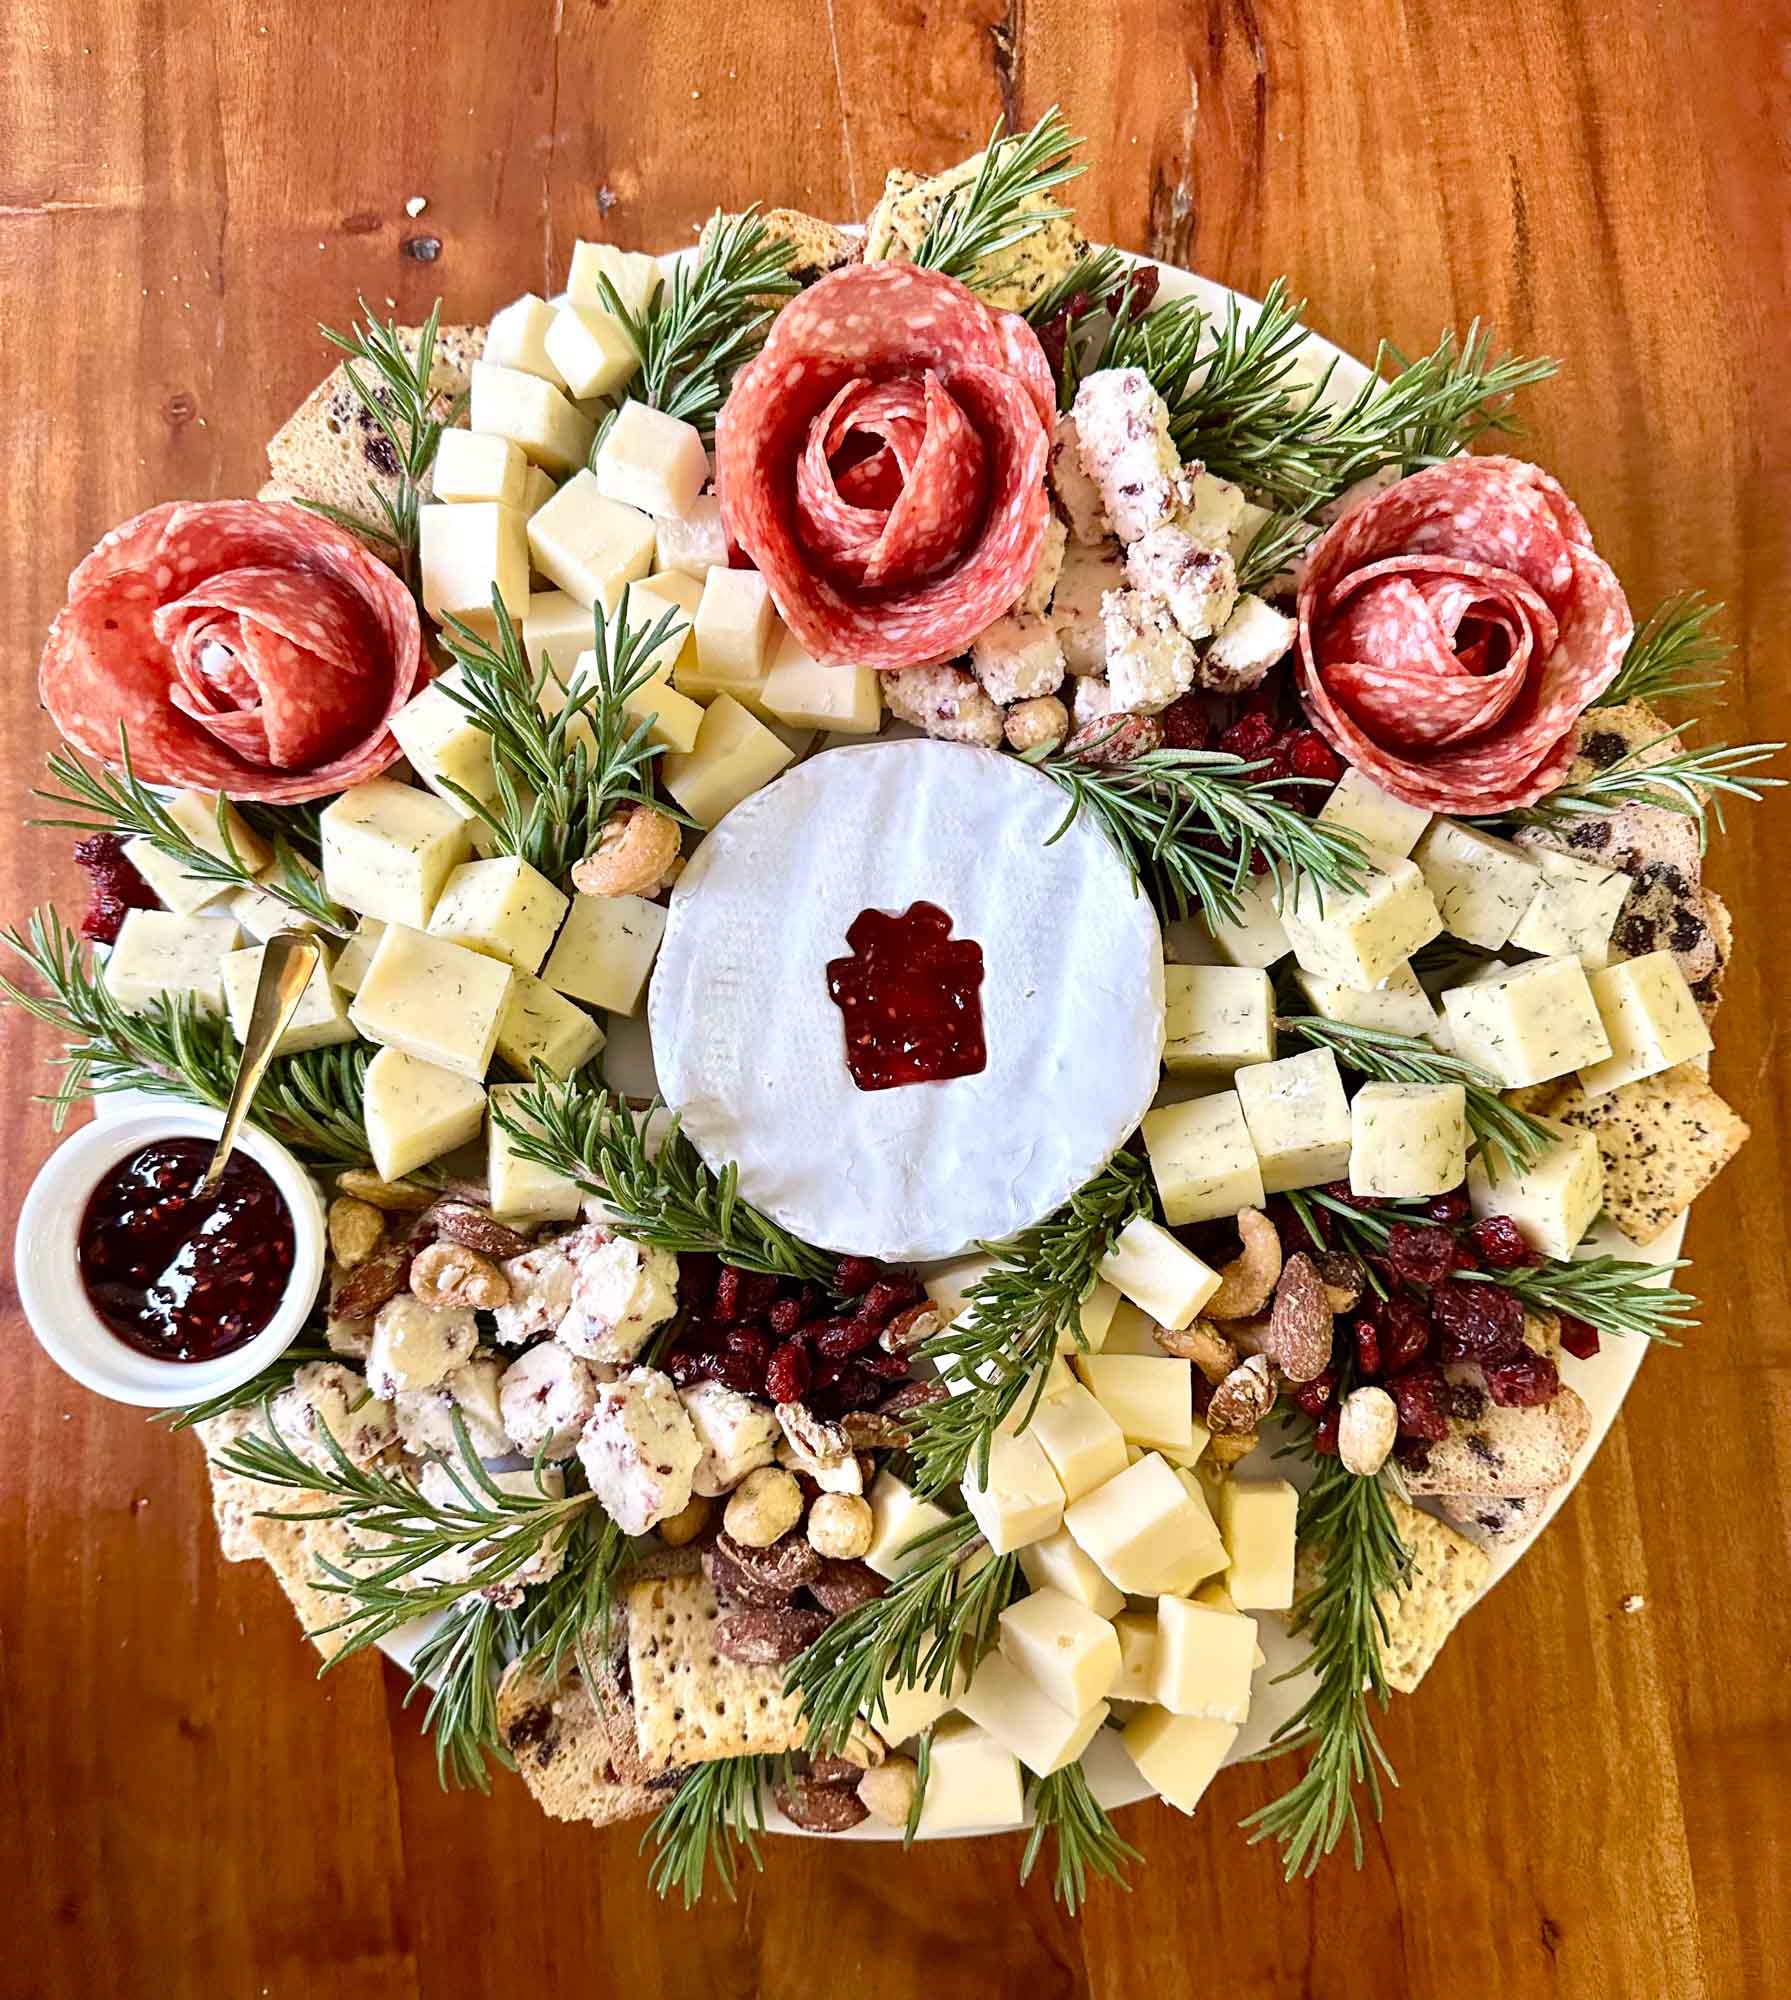
Once you’ve added the cheeses and salami, use the rest of your charcuterie elements (minus the prosciutto) to complete your wreath.
Arrange the crackers around the edges of the wreath, tucking them beneath other ingredients where you can. Cluster fruit, dried fruit, and nuts to fill any empty spots, and adjust your cheeses to balance everything out.
When you’re happy with the layout, tuck the remaining rosemary sprigs throughout your wreath. Add as many as you like, but keep the spacing fairly even. The more greenery you add, the more wreath-like your charcuterie board will appear!
5. Finish Your Wreath with a Bow
When I started designing my Christmas wreath charcuterie board, I knew a bow would be the perfect finishing touch. After searching online for inspiration and not finding what I was envisioning, I decided to create a prosciutto bow of my own.
Prosciutto can be tricky to work with, but it turned out to be surprisingly simple! You can also use a fabric ribbon if you prefer, but I think it’s more fun when the bow is edible and part of the presentation.
How to Create a Prosciutto Bow for Your Charcuterie Wreath
To make a prosciutto bow for your wreath, follow these simple steps:
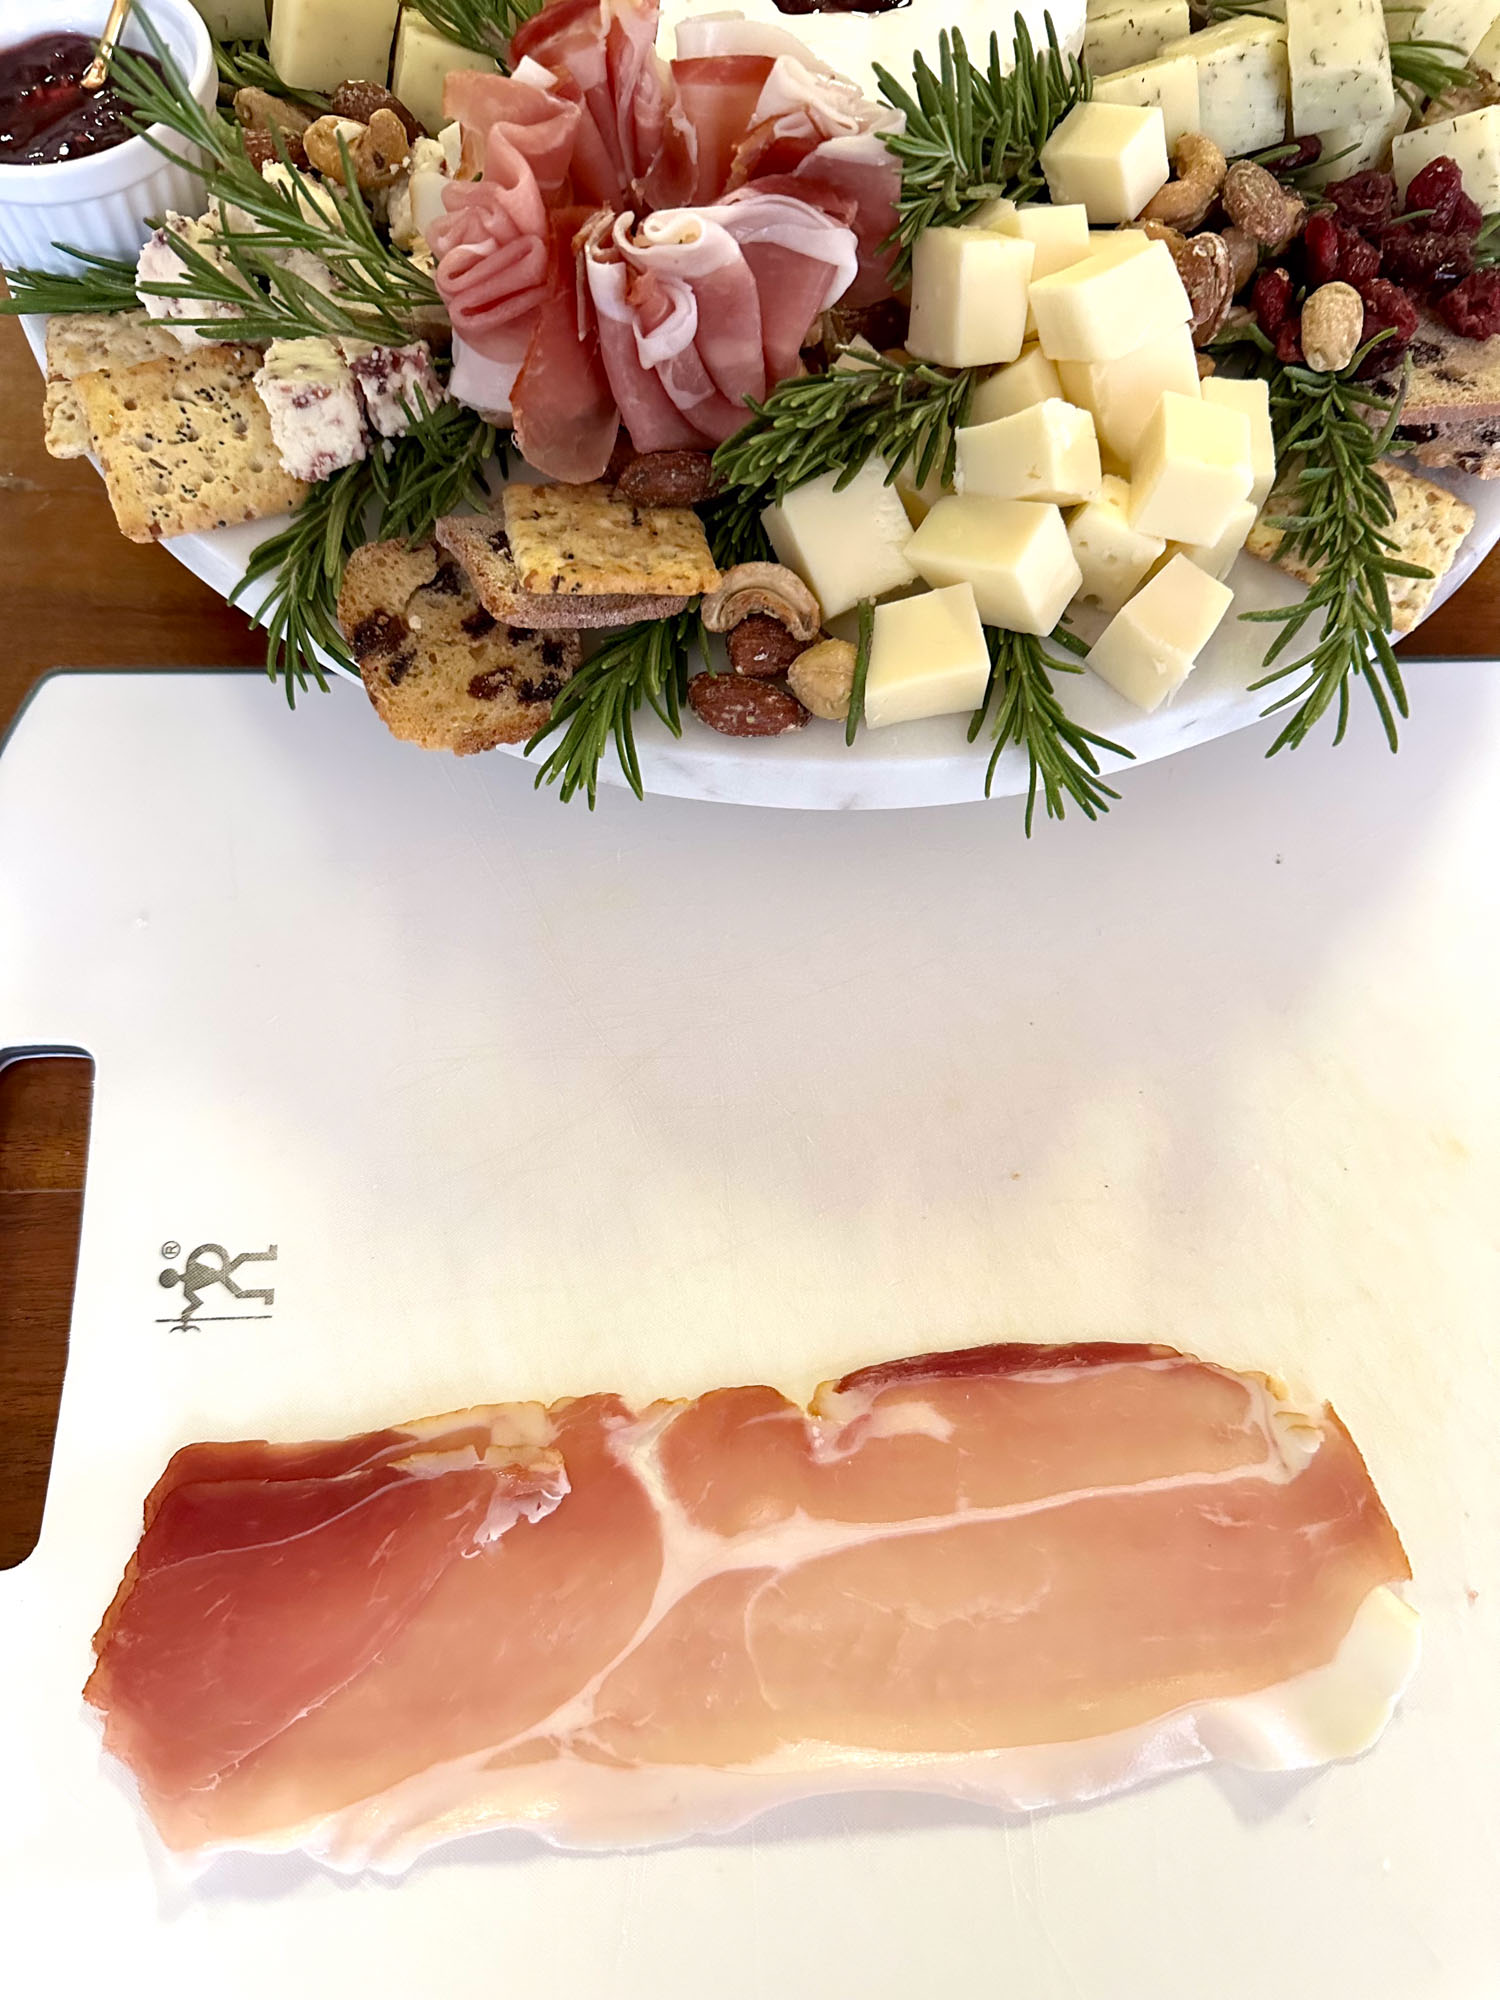
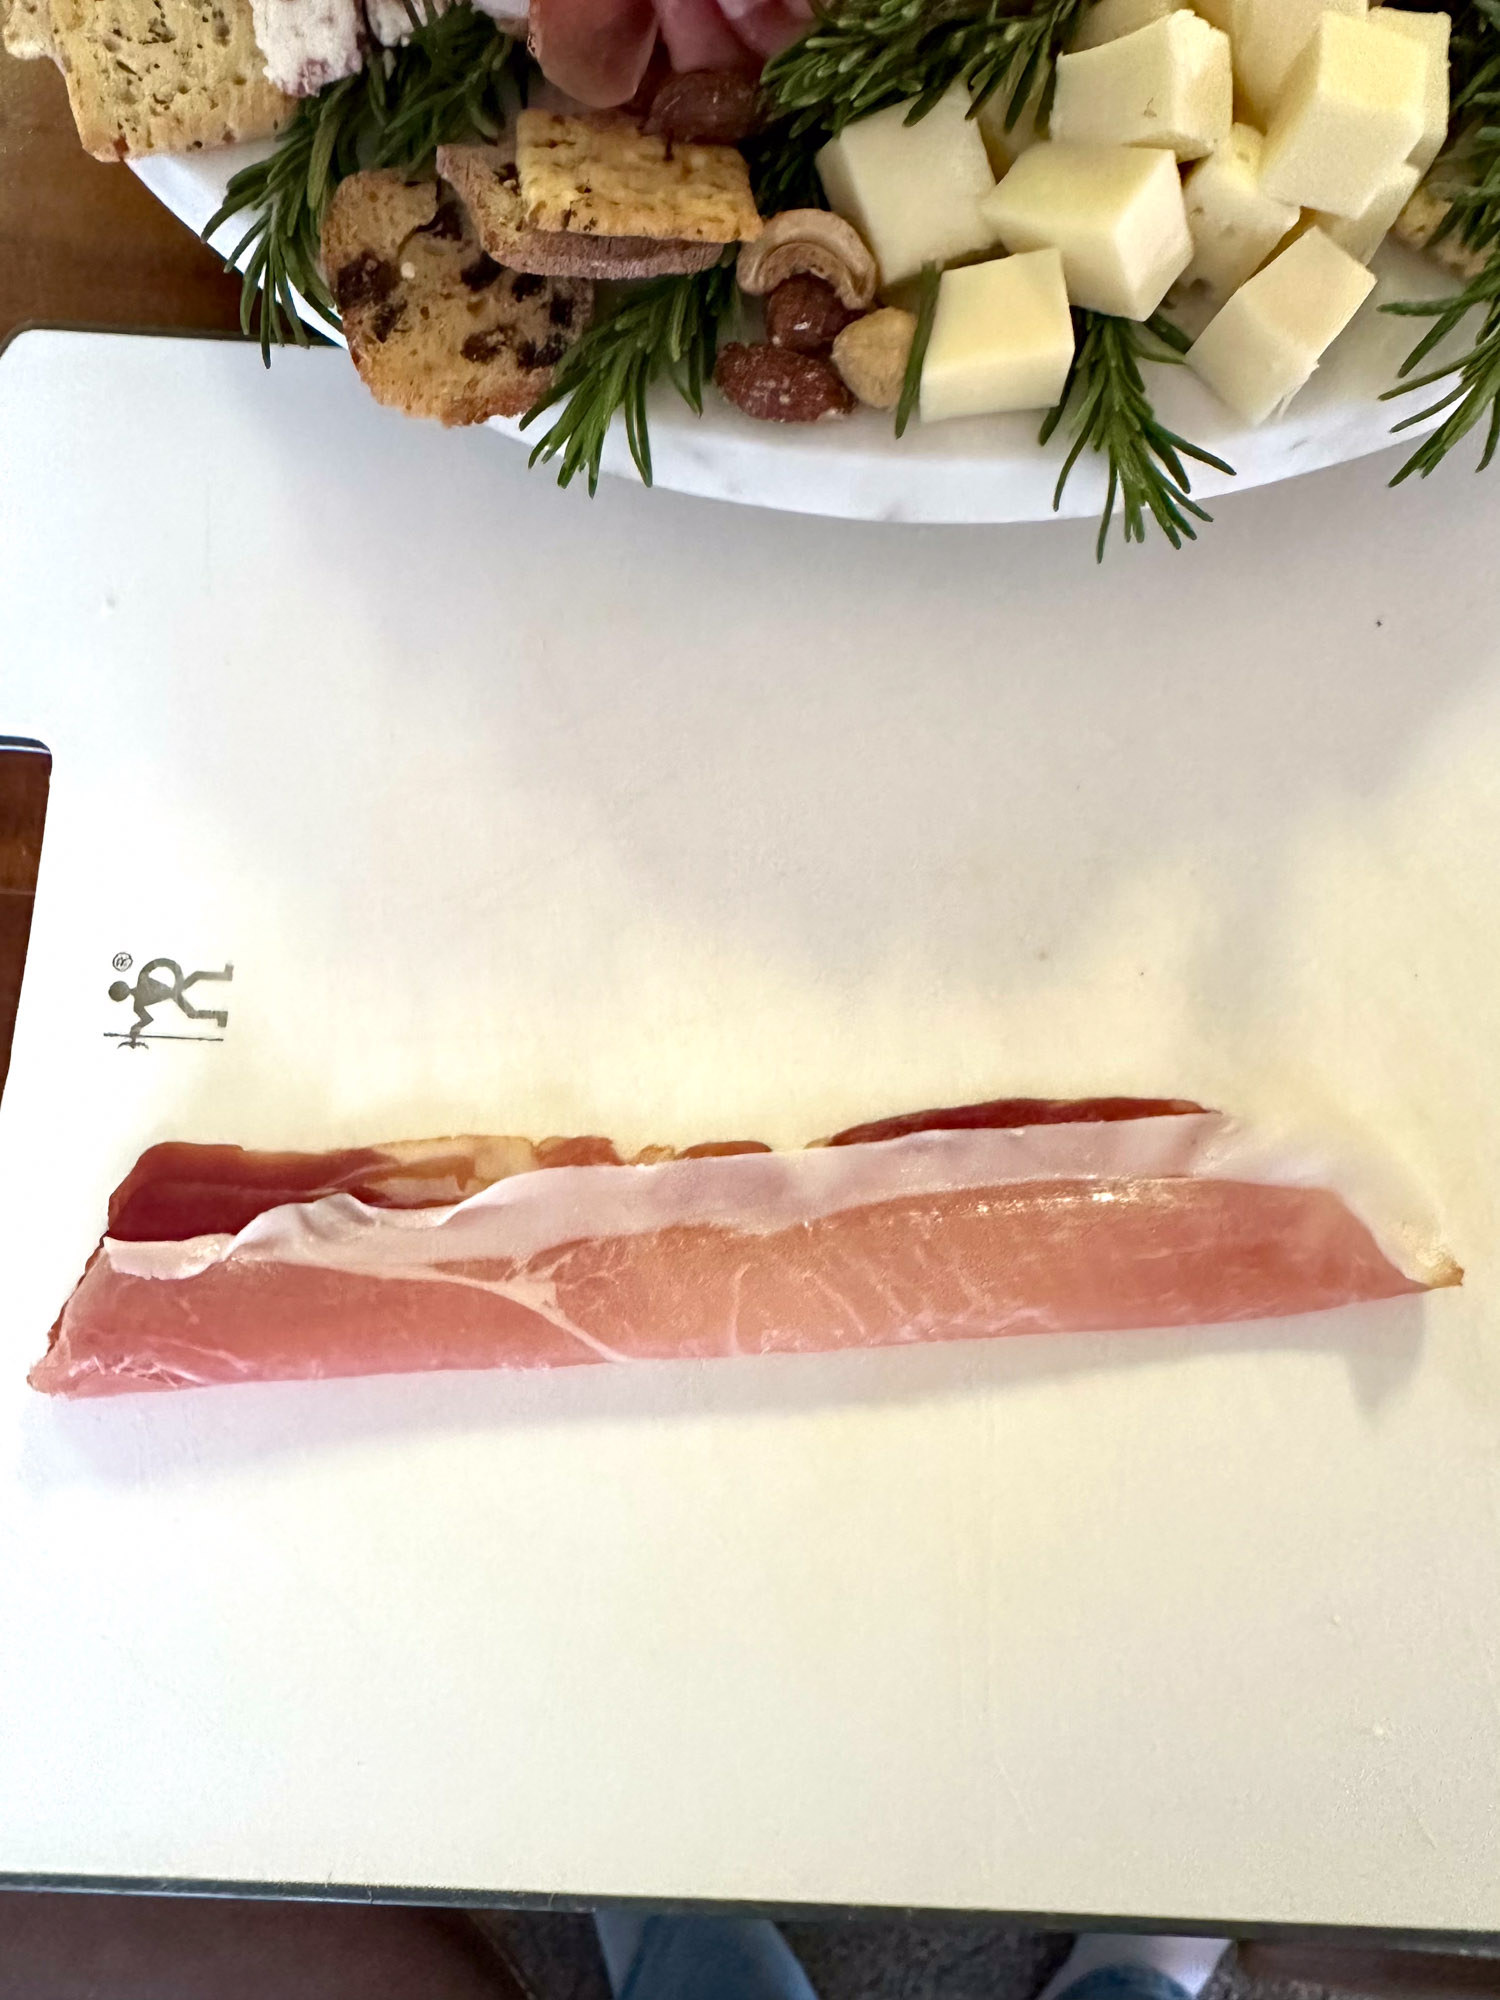
- Fold into ribbons: Create multiple prosciutto ribbons by folding individual slices in half lengthwise. It’s okay if they tear a little, as long as they keep their general shape.
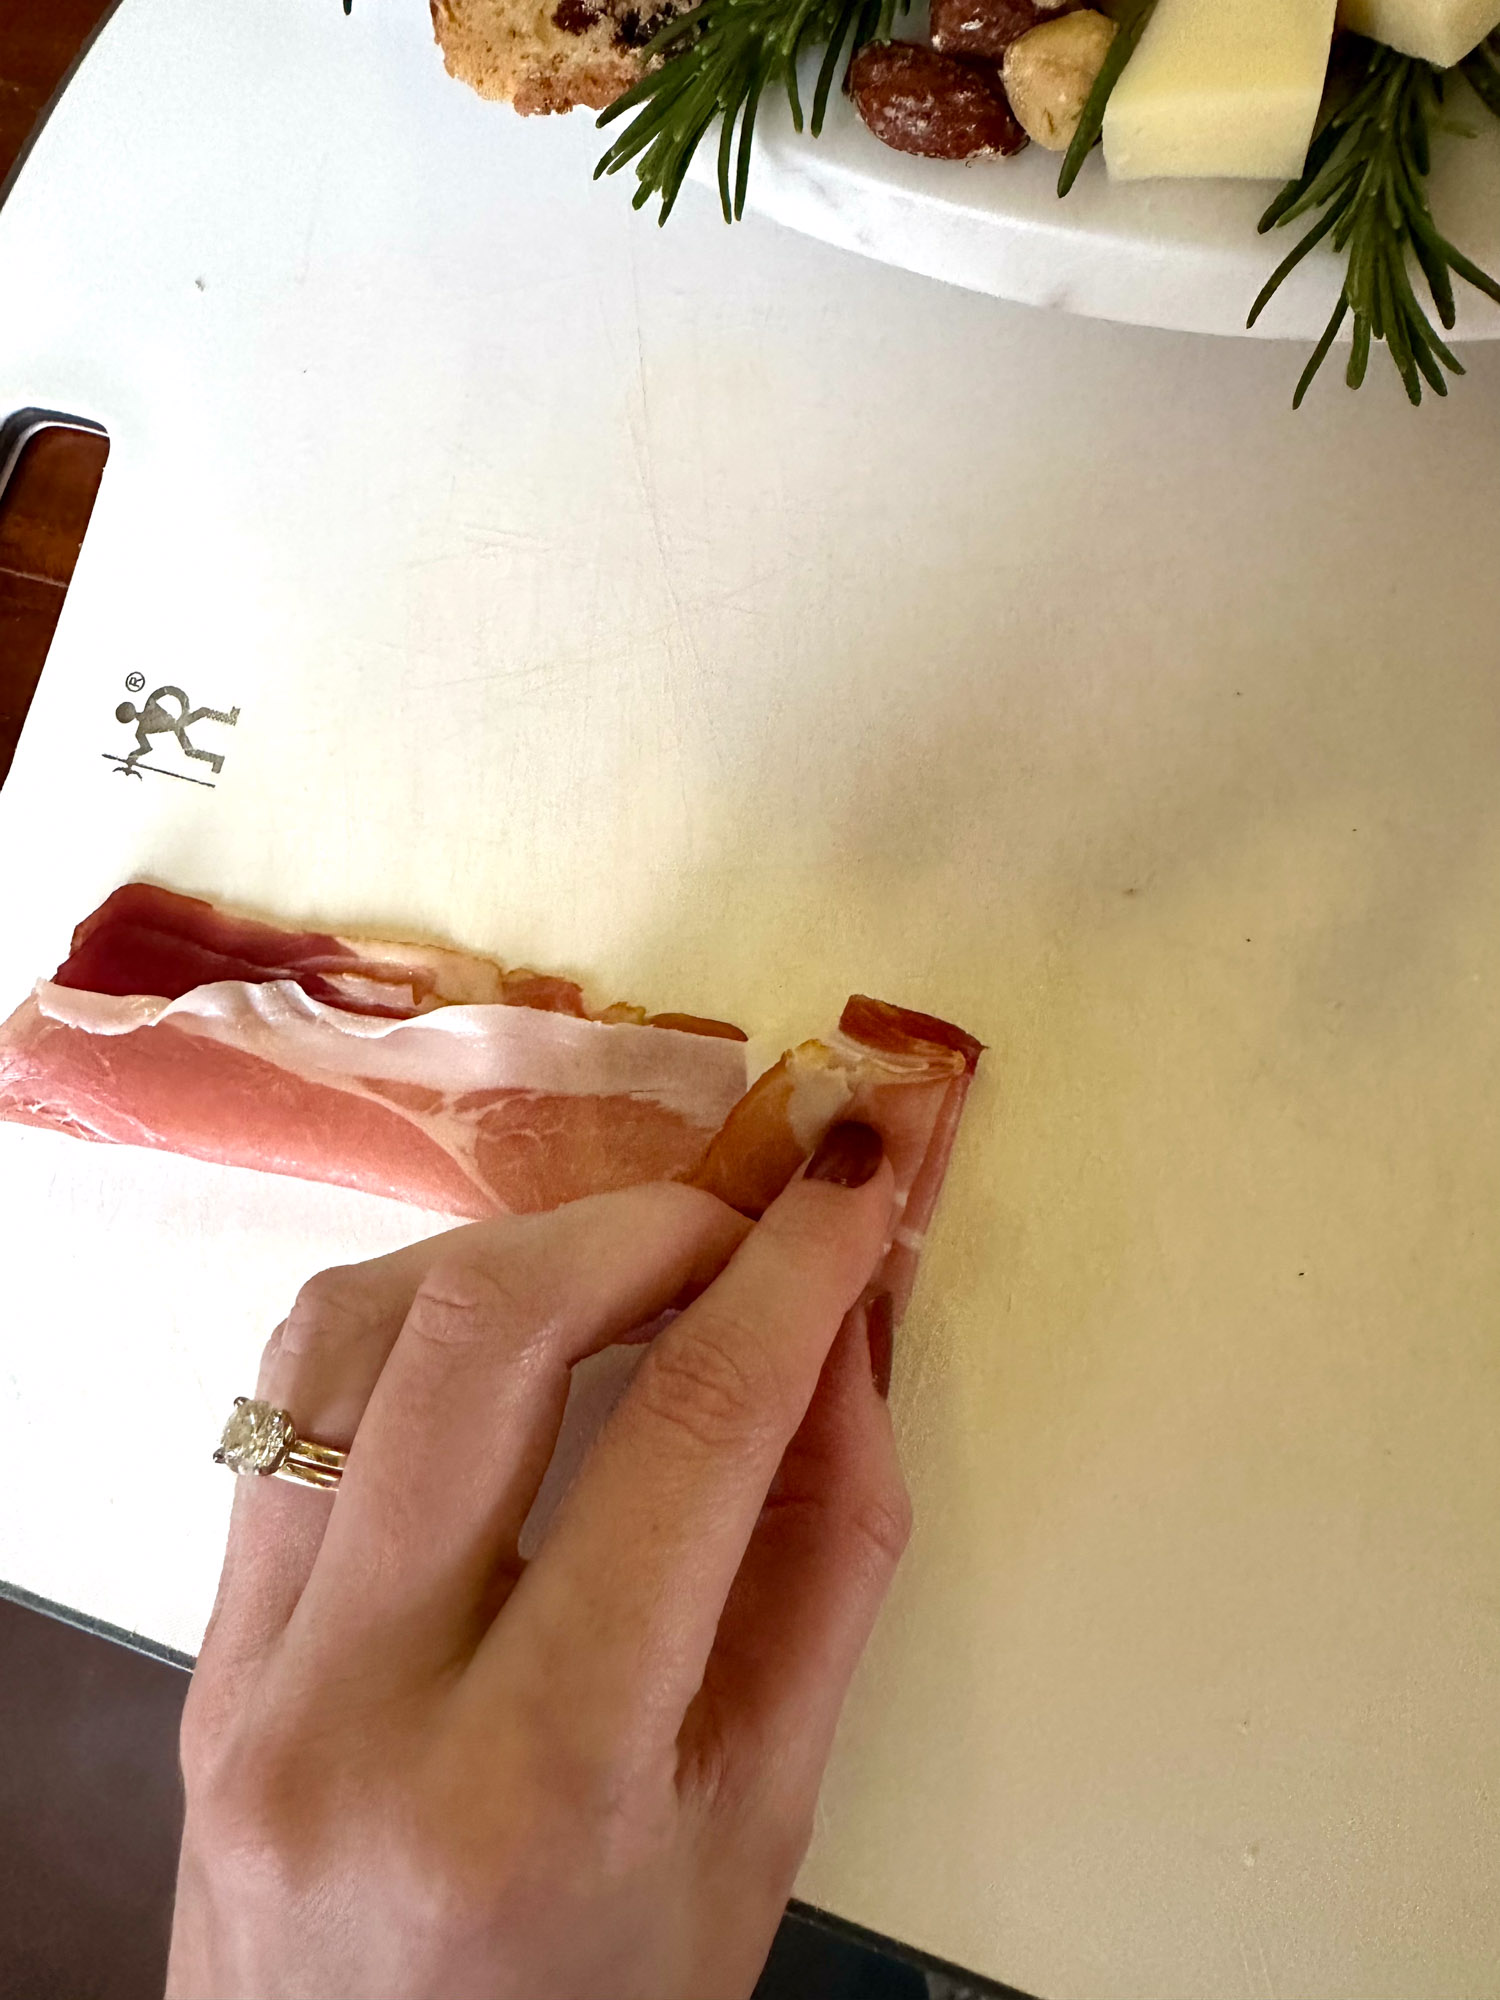
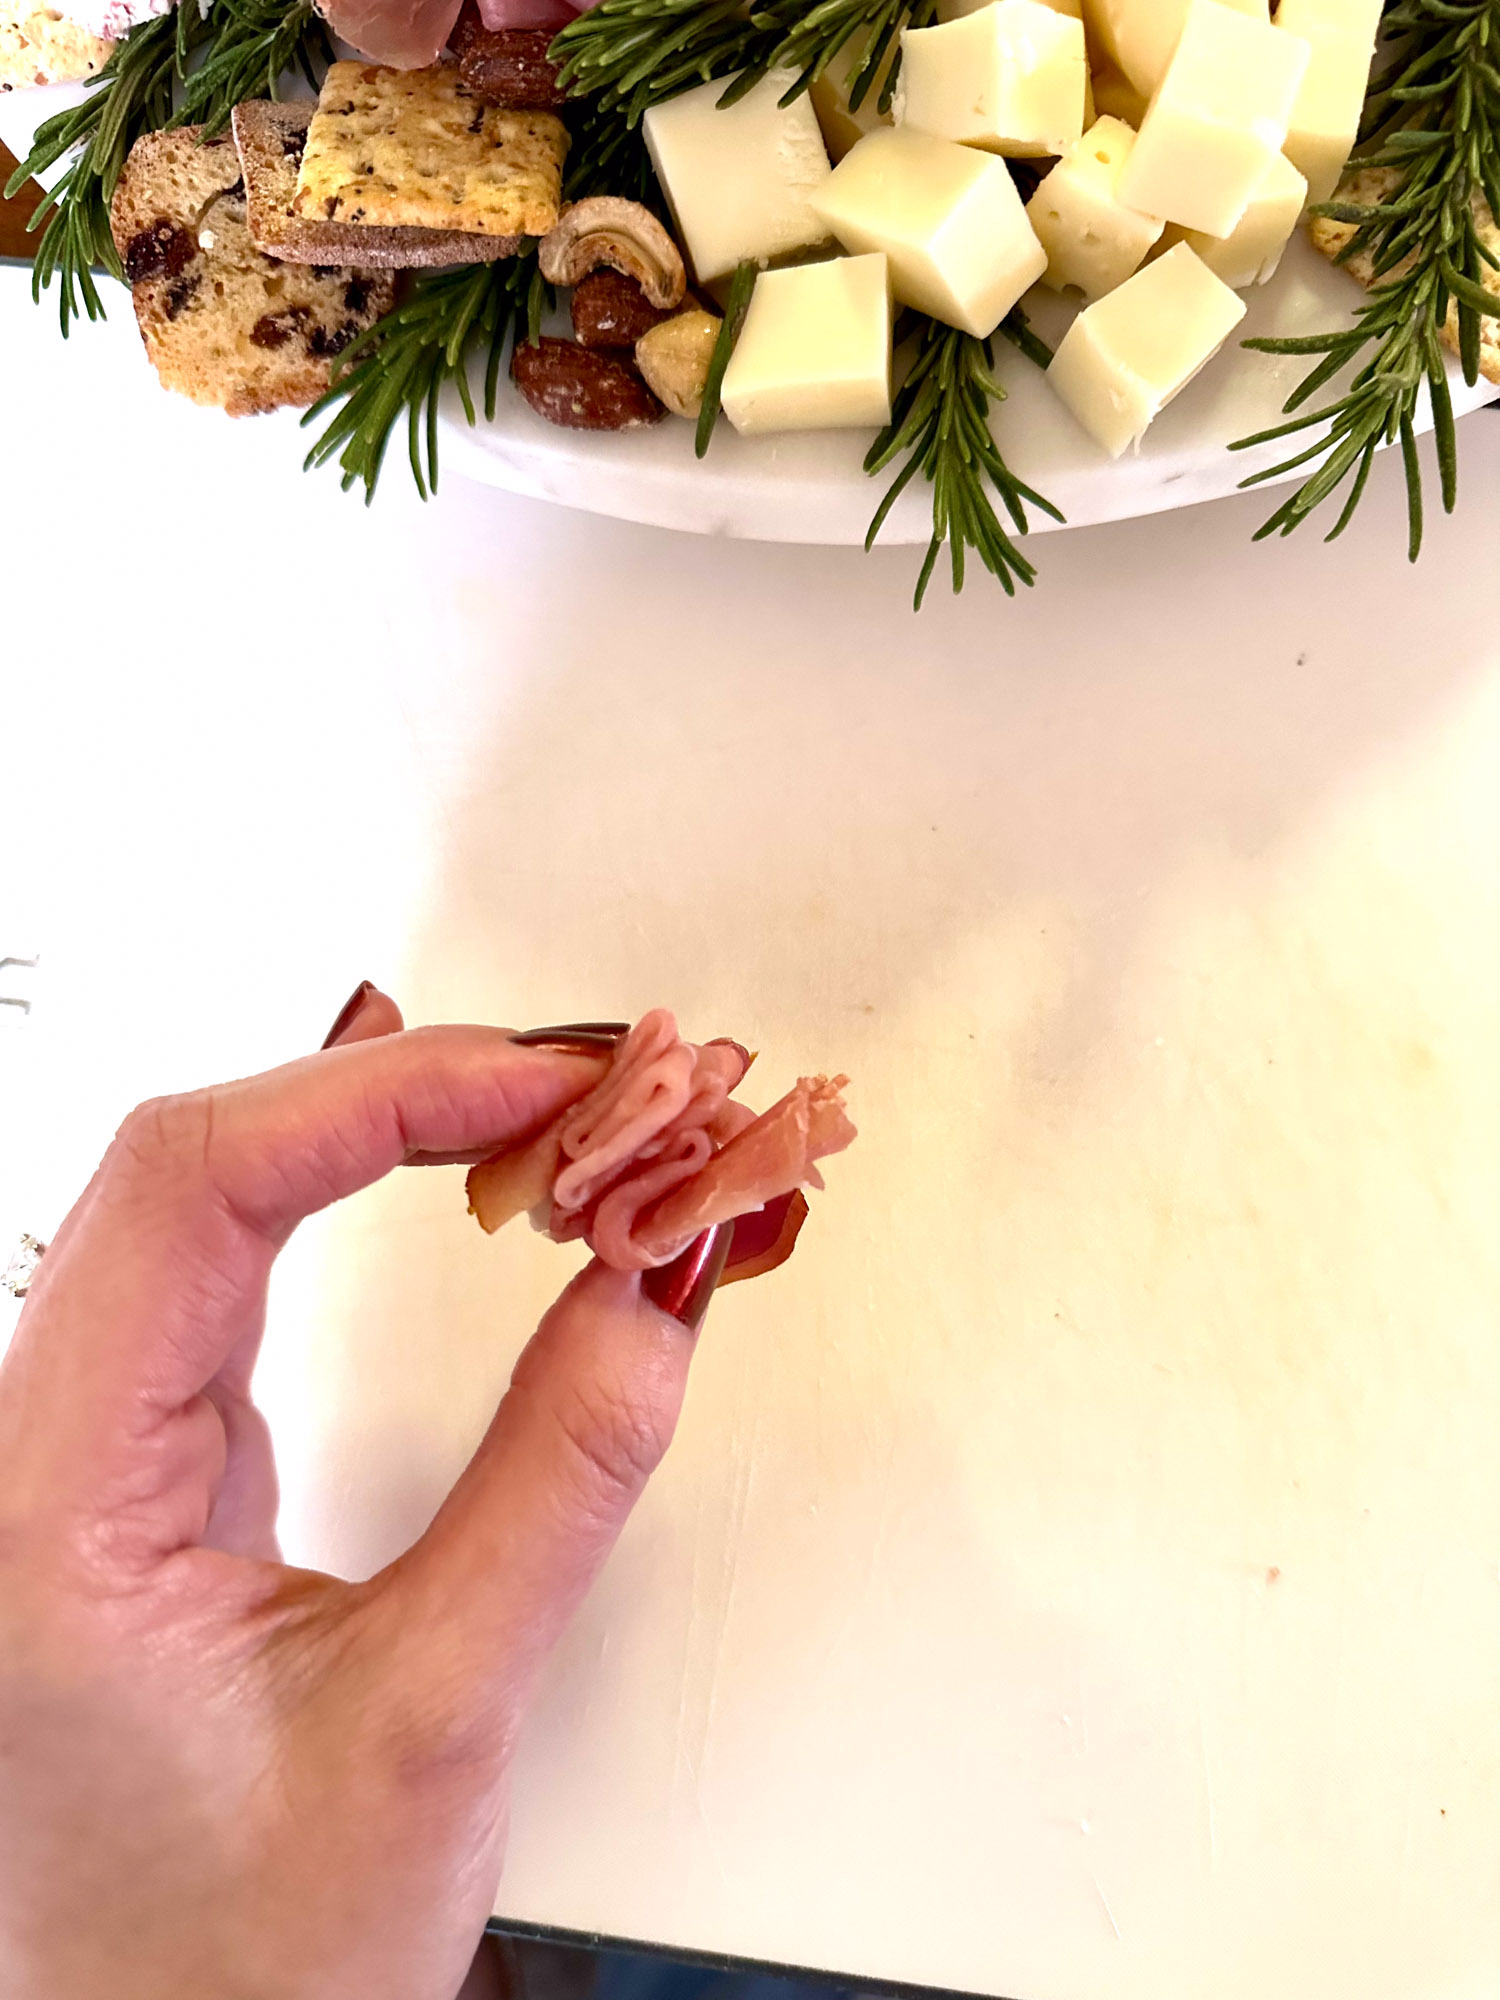
- Form accordion folds: Fold each ribbon back and forth in alternating directions, accordion-style.
- Shape the loops: Position the ribbons back to back at the base of the wreath in two circular shapes to form the bow loops. (I used about four ribbons for each loop.)
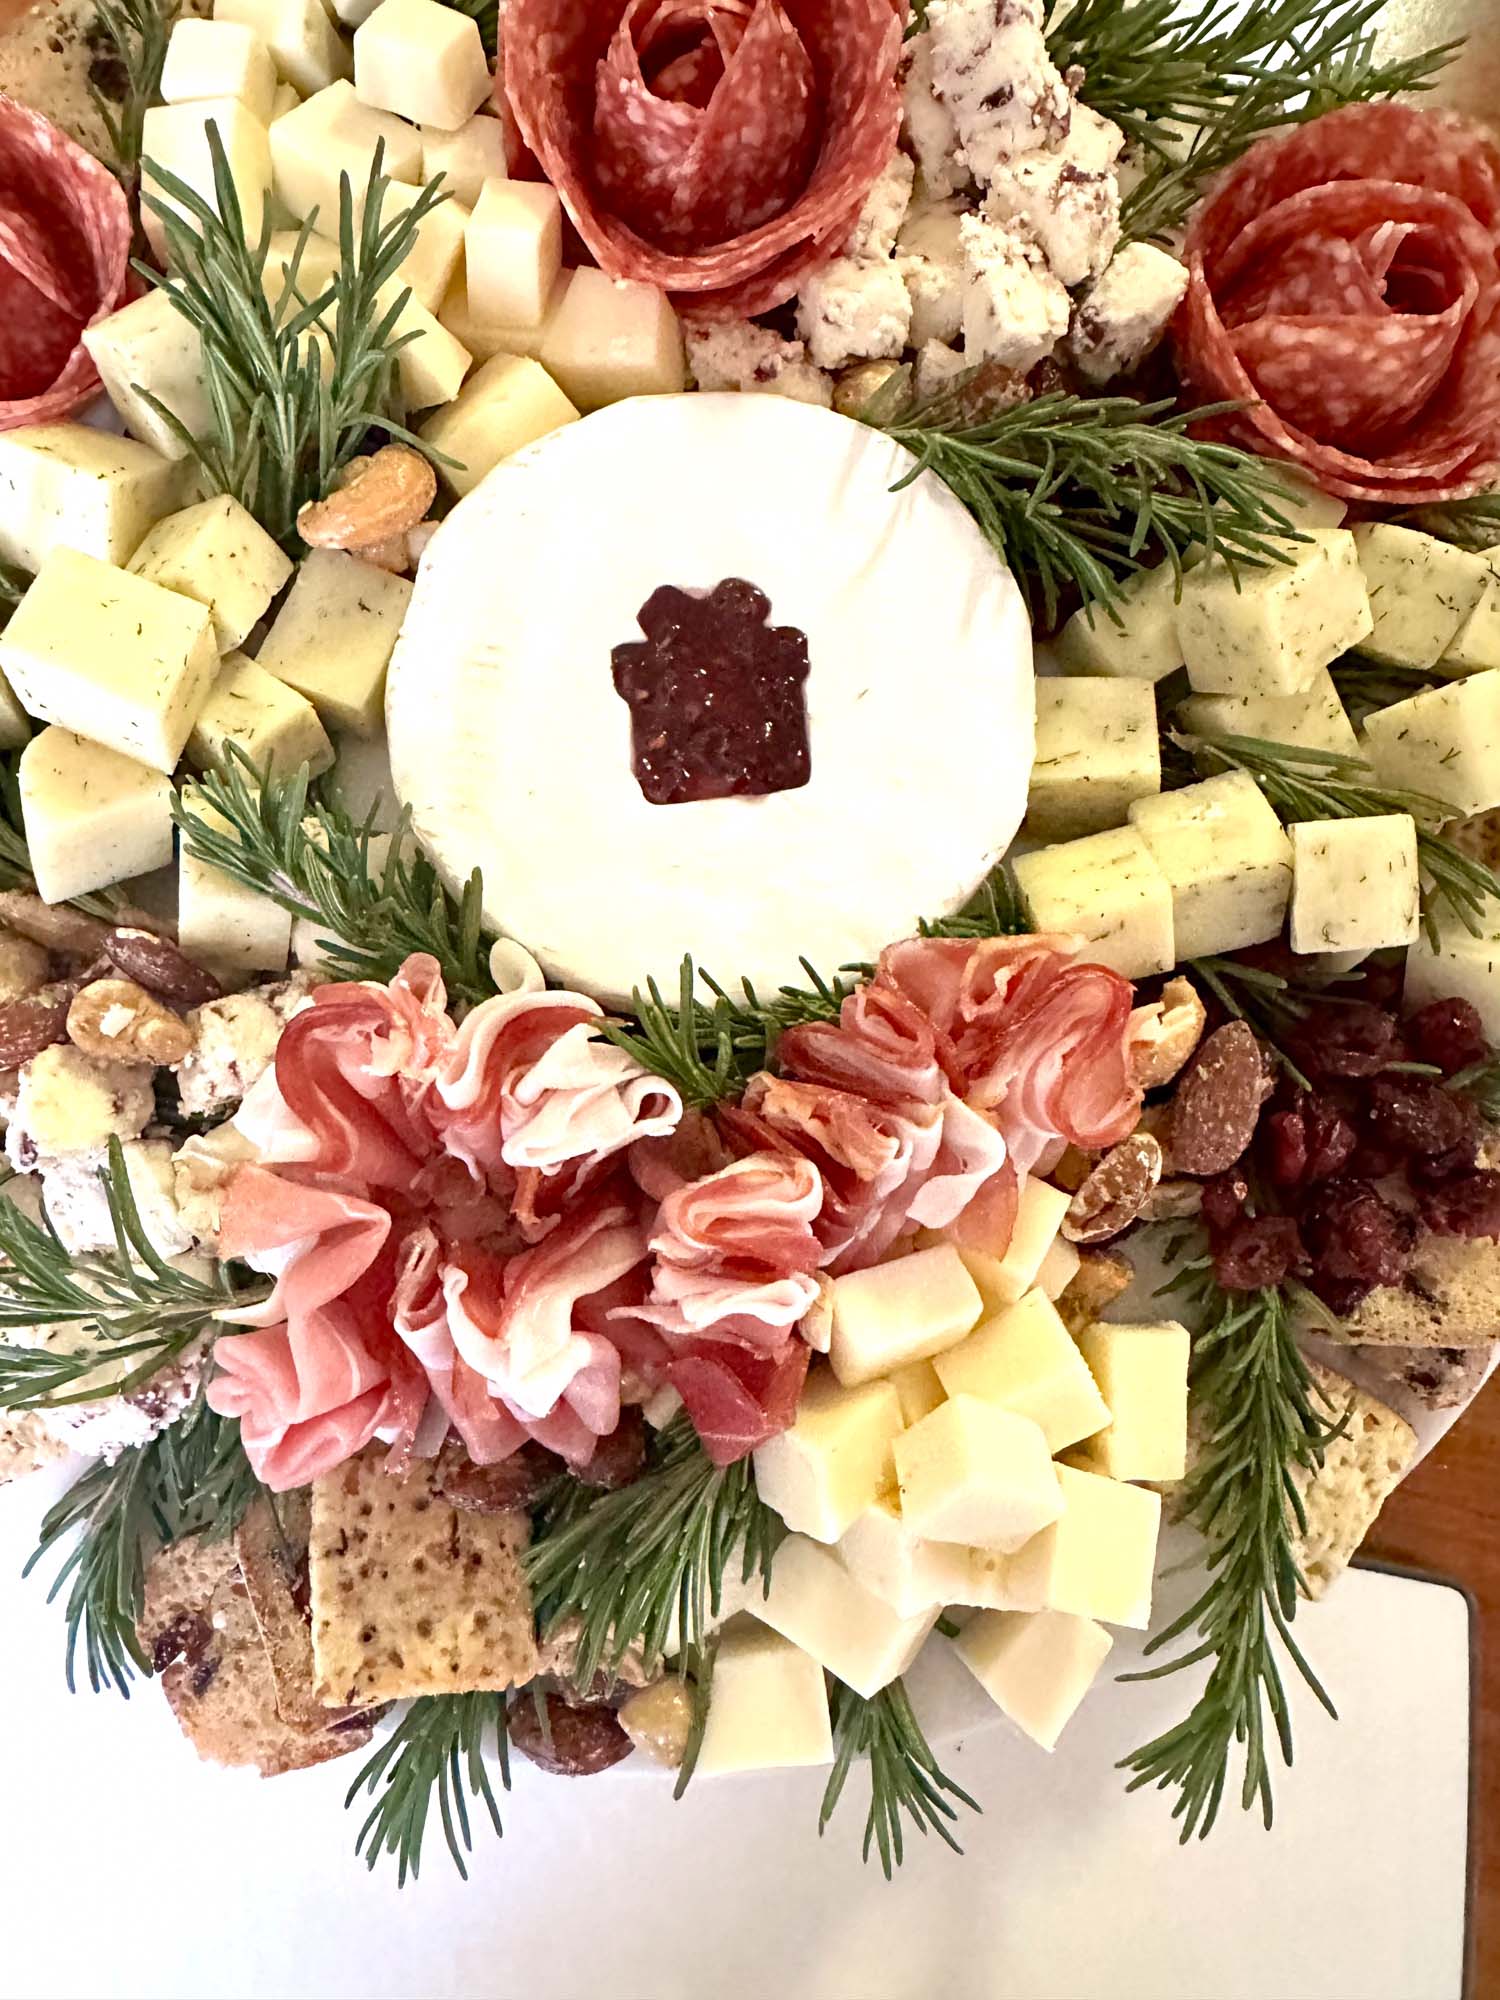
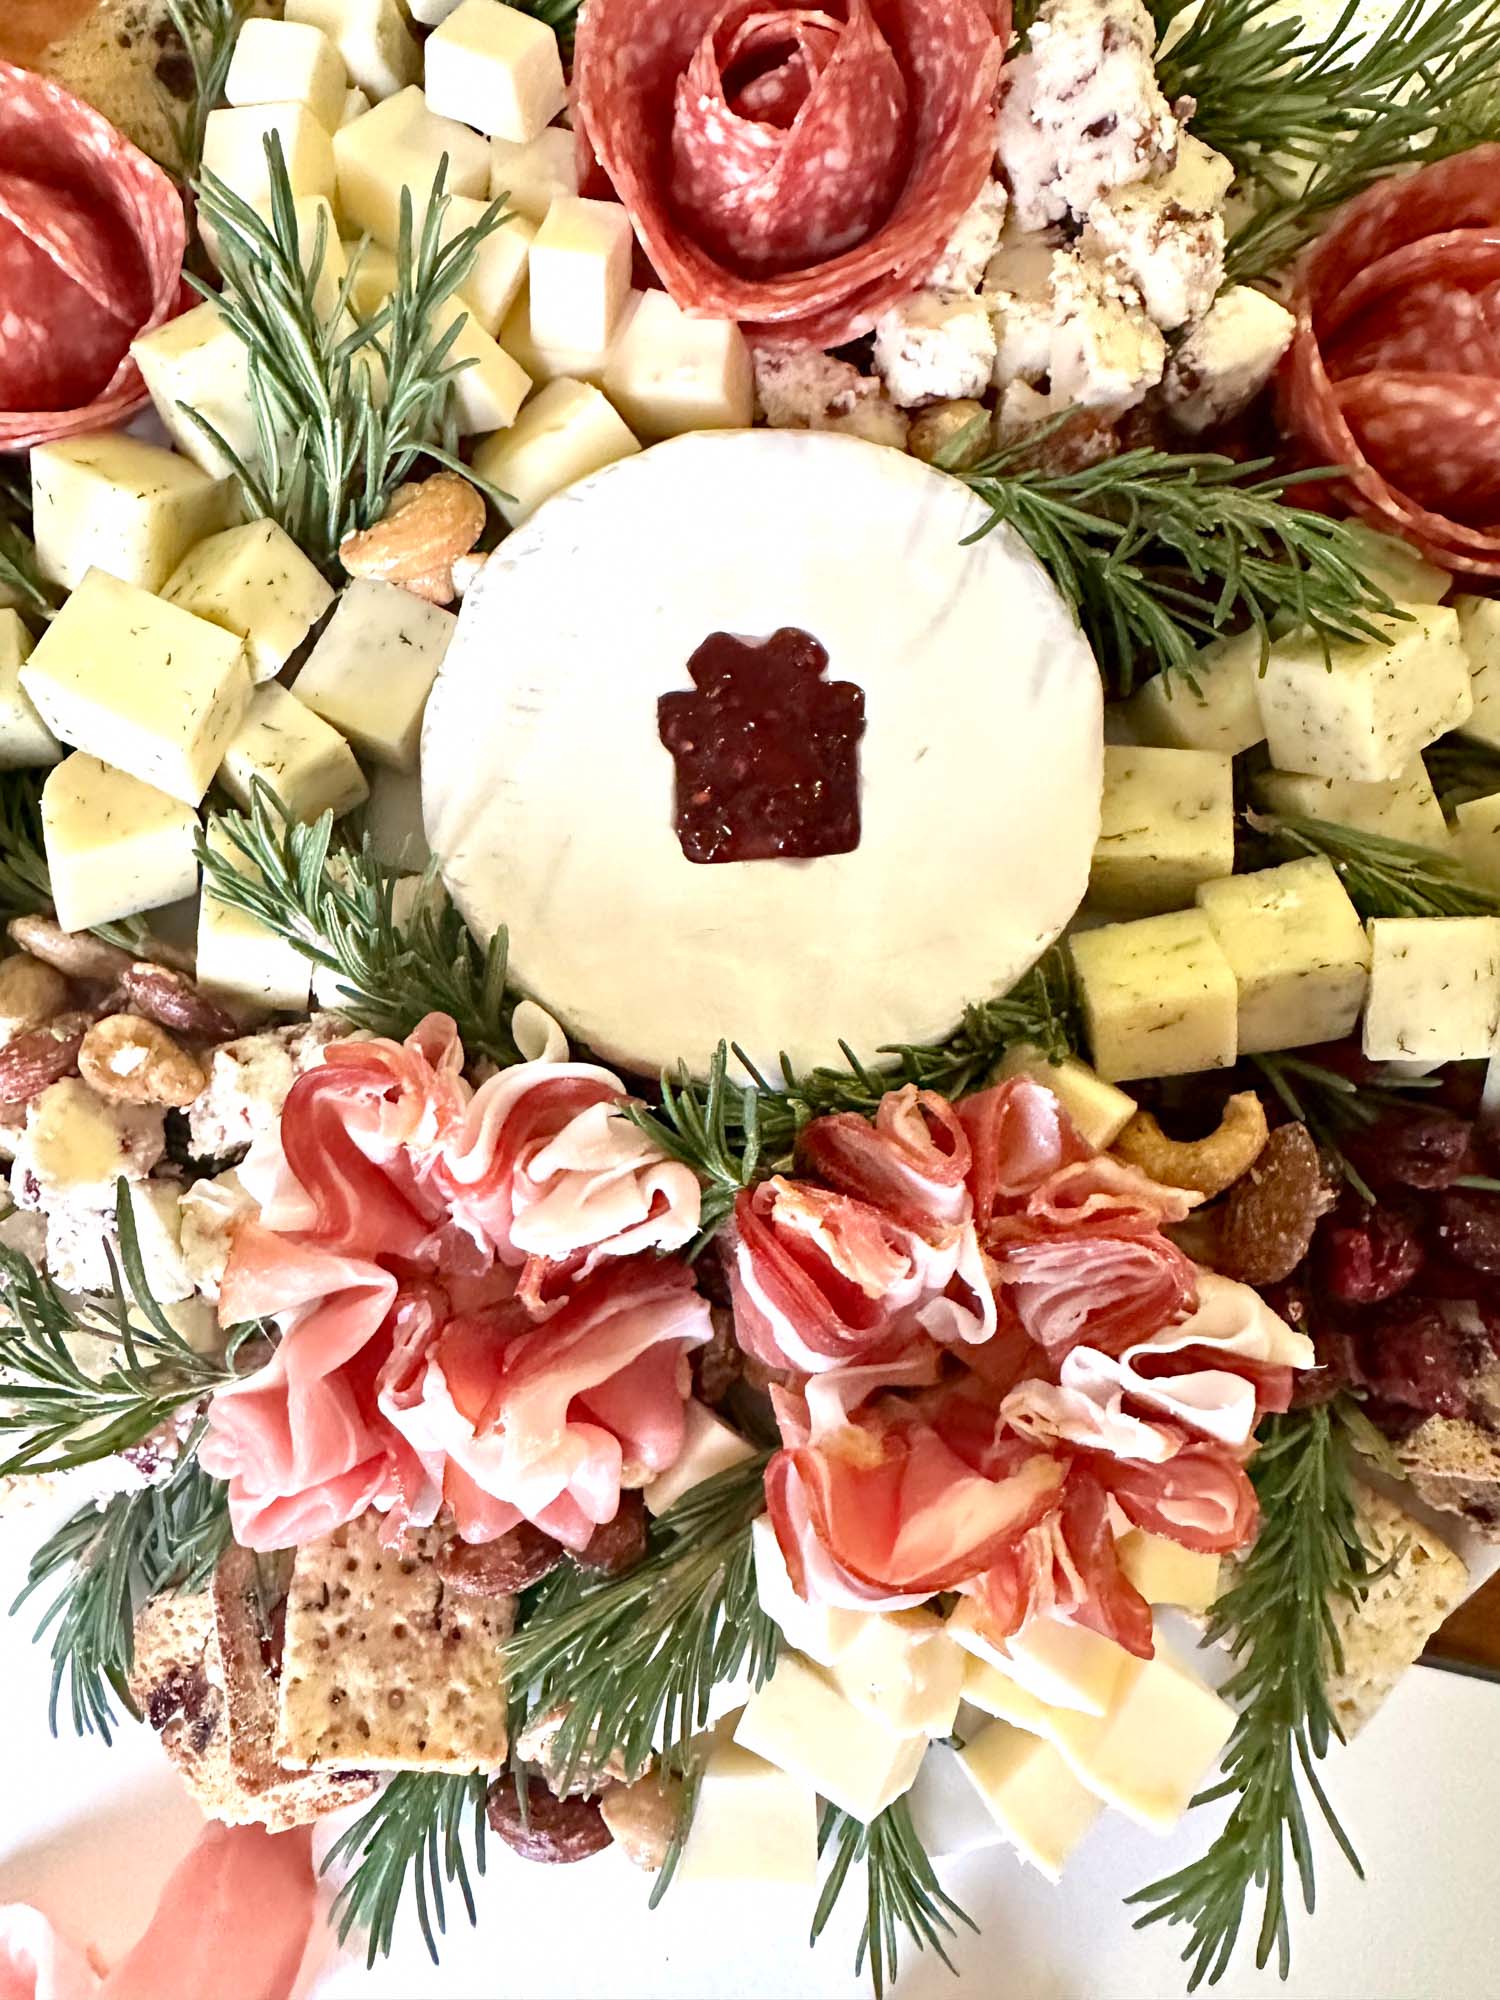
- Add the tails: Fold two more slices in half lengthwise, then layer them between the loops to create the ribbon ends. Adjust the length by folding some of the prosciutto underneath if needed. Don’t worry about making it perfect — slightly uneven looks more natural.
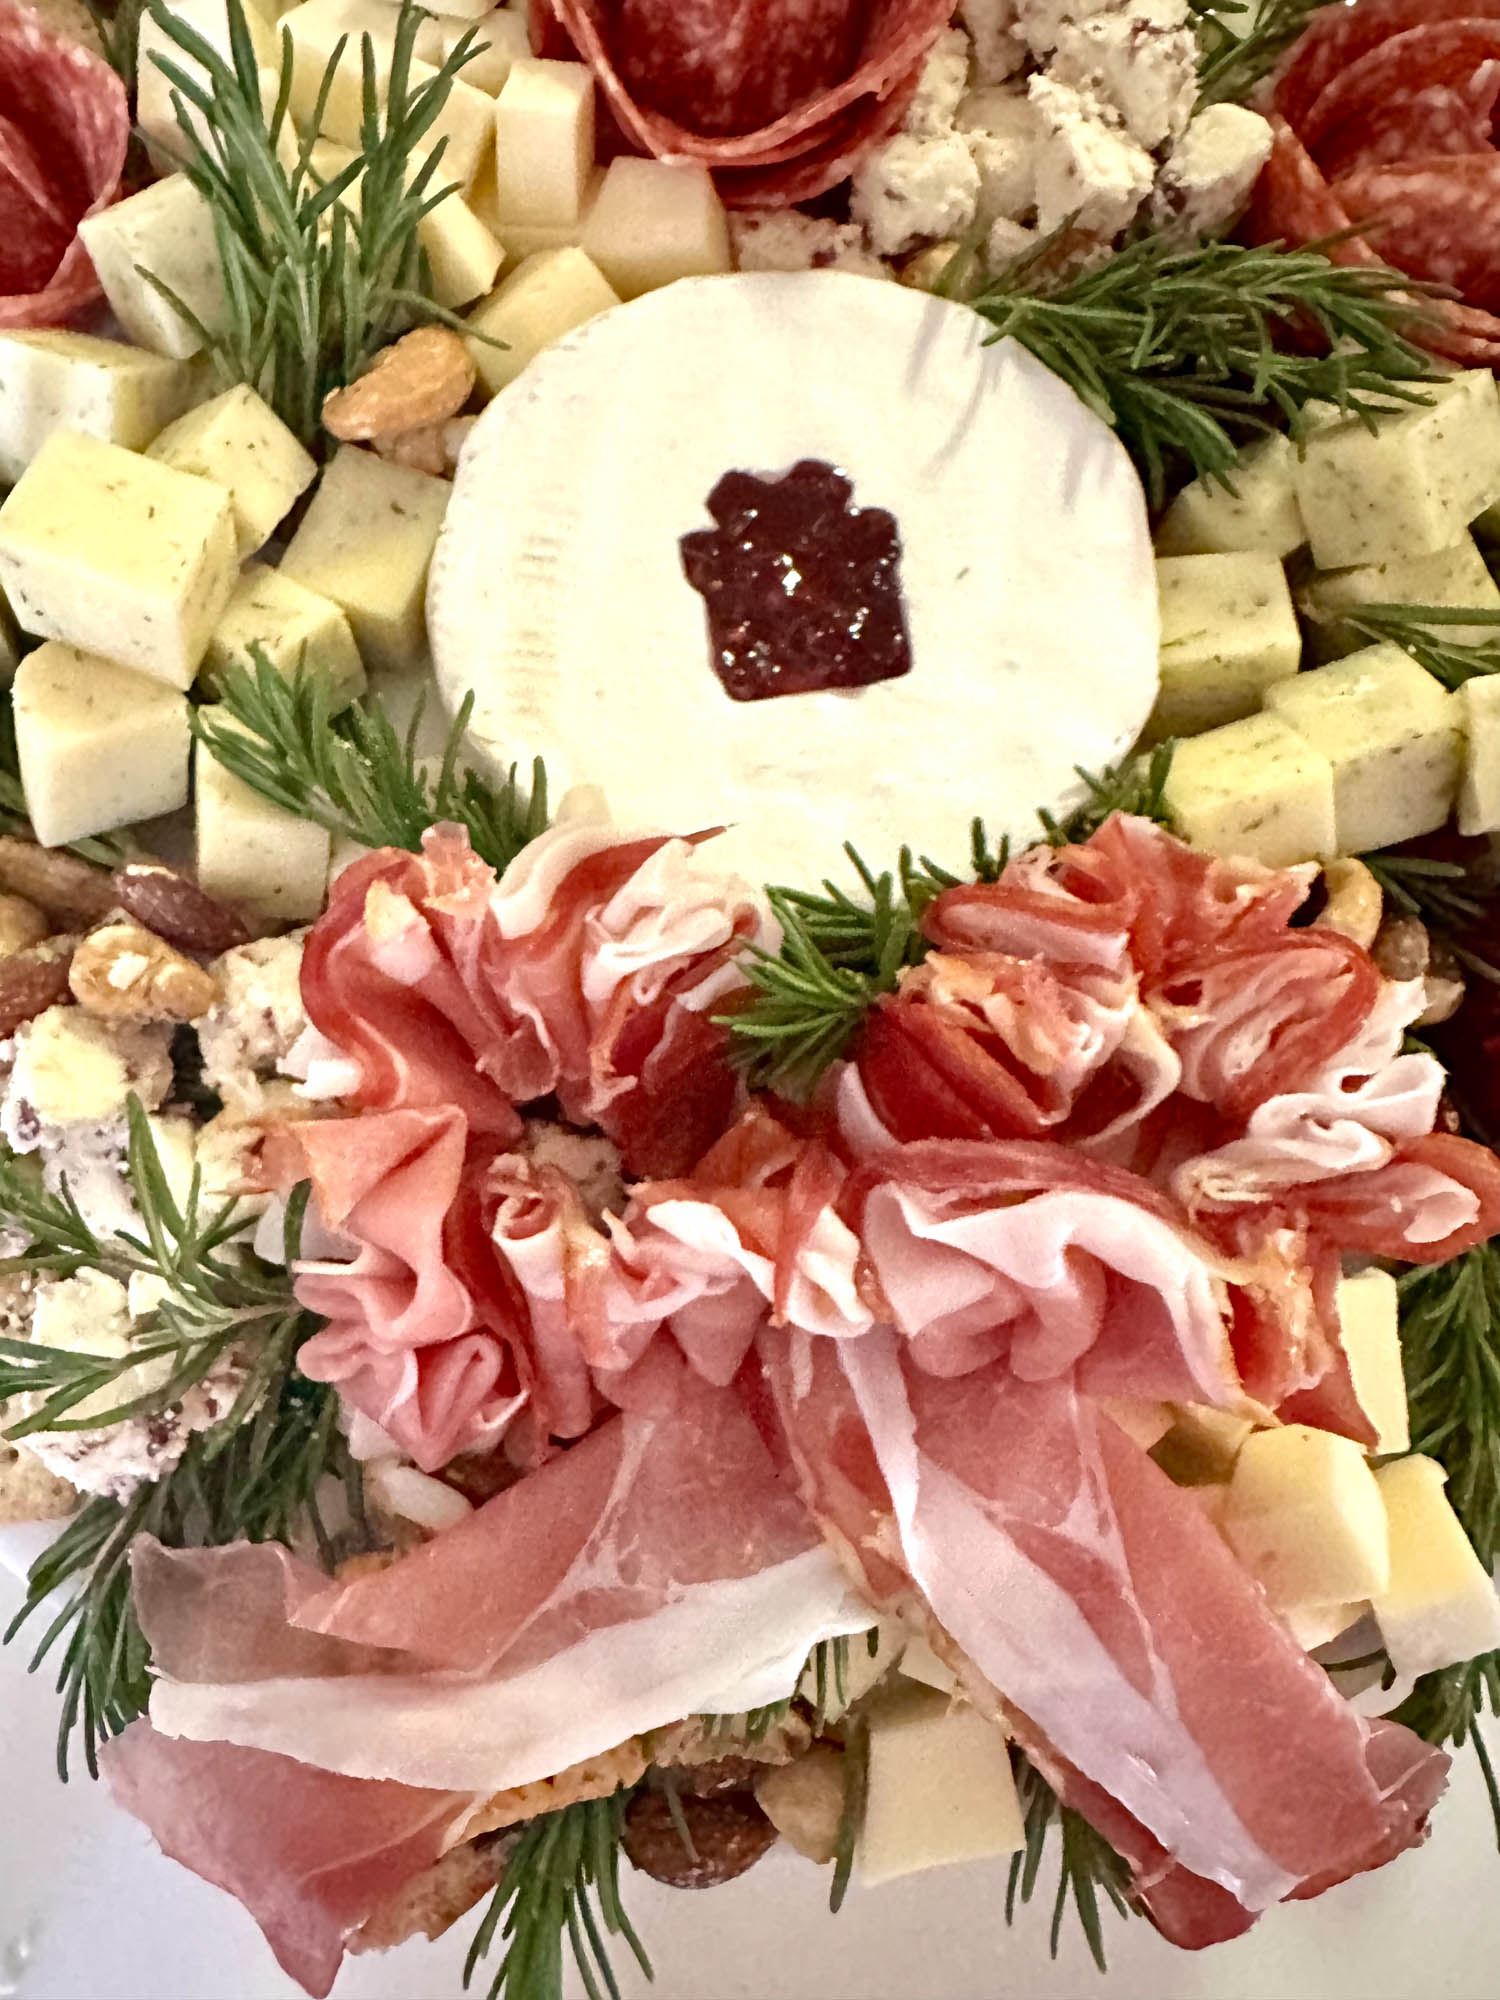
- Finish the center knot: Take one last slice, fold it in half, and roll it into a small loop to form the knot. Set it in the middle of the bow.
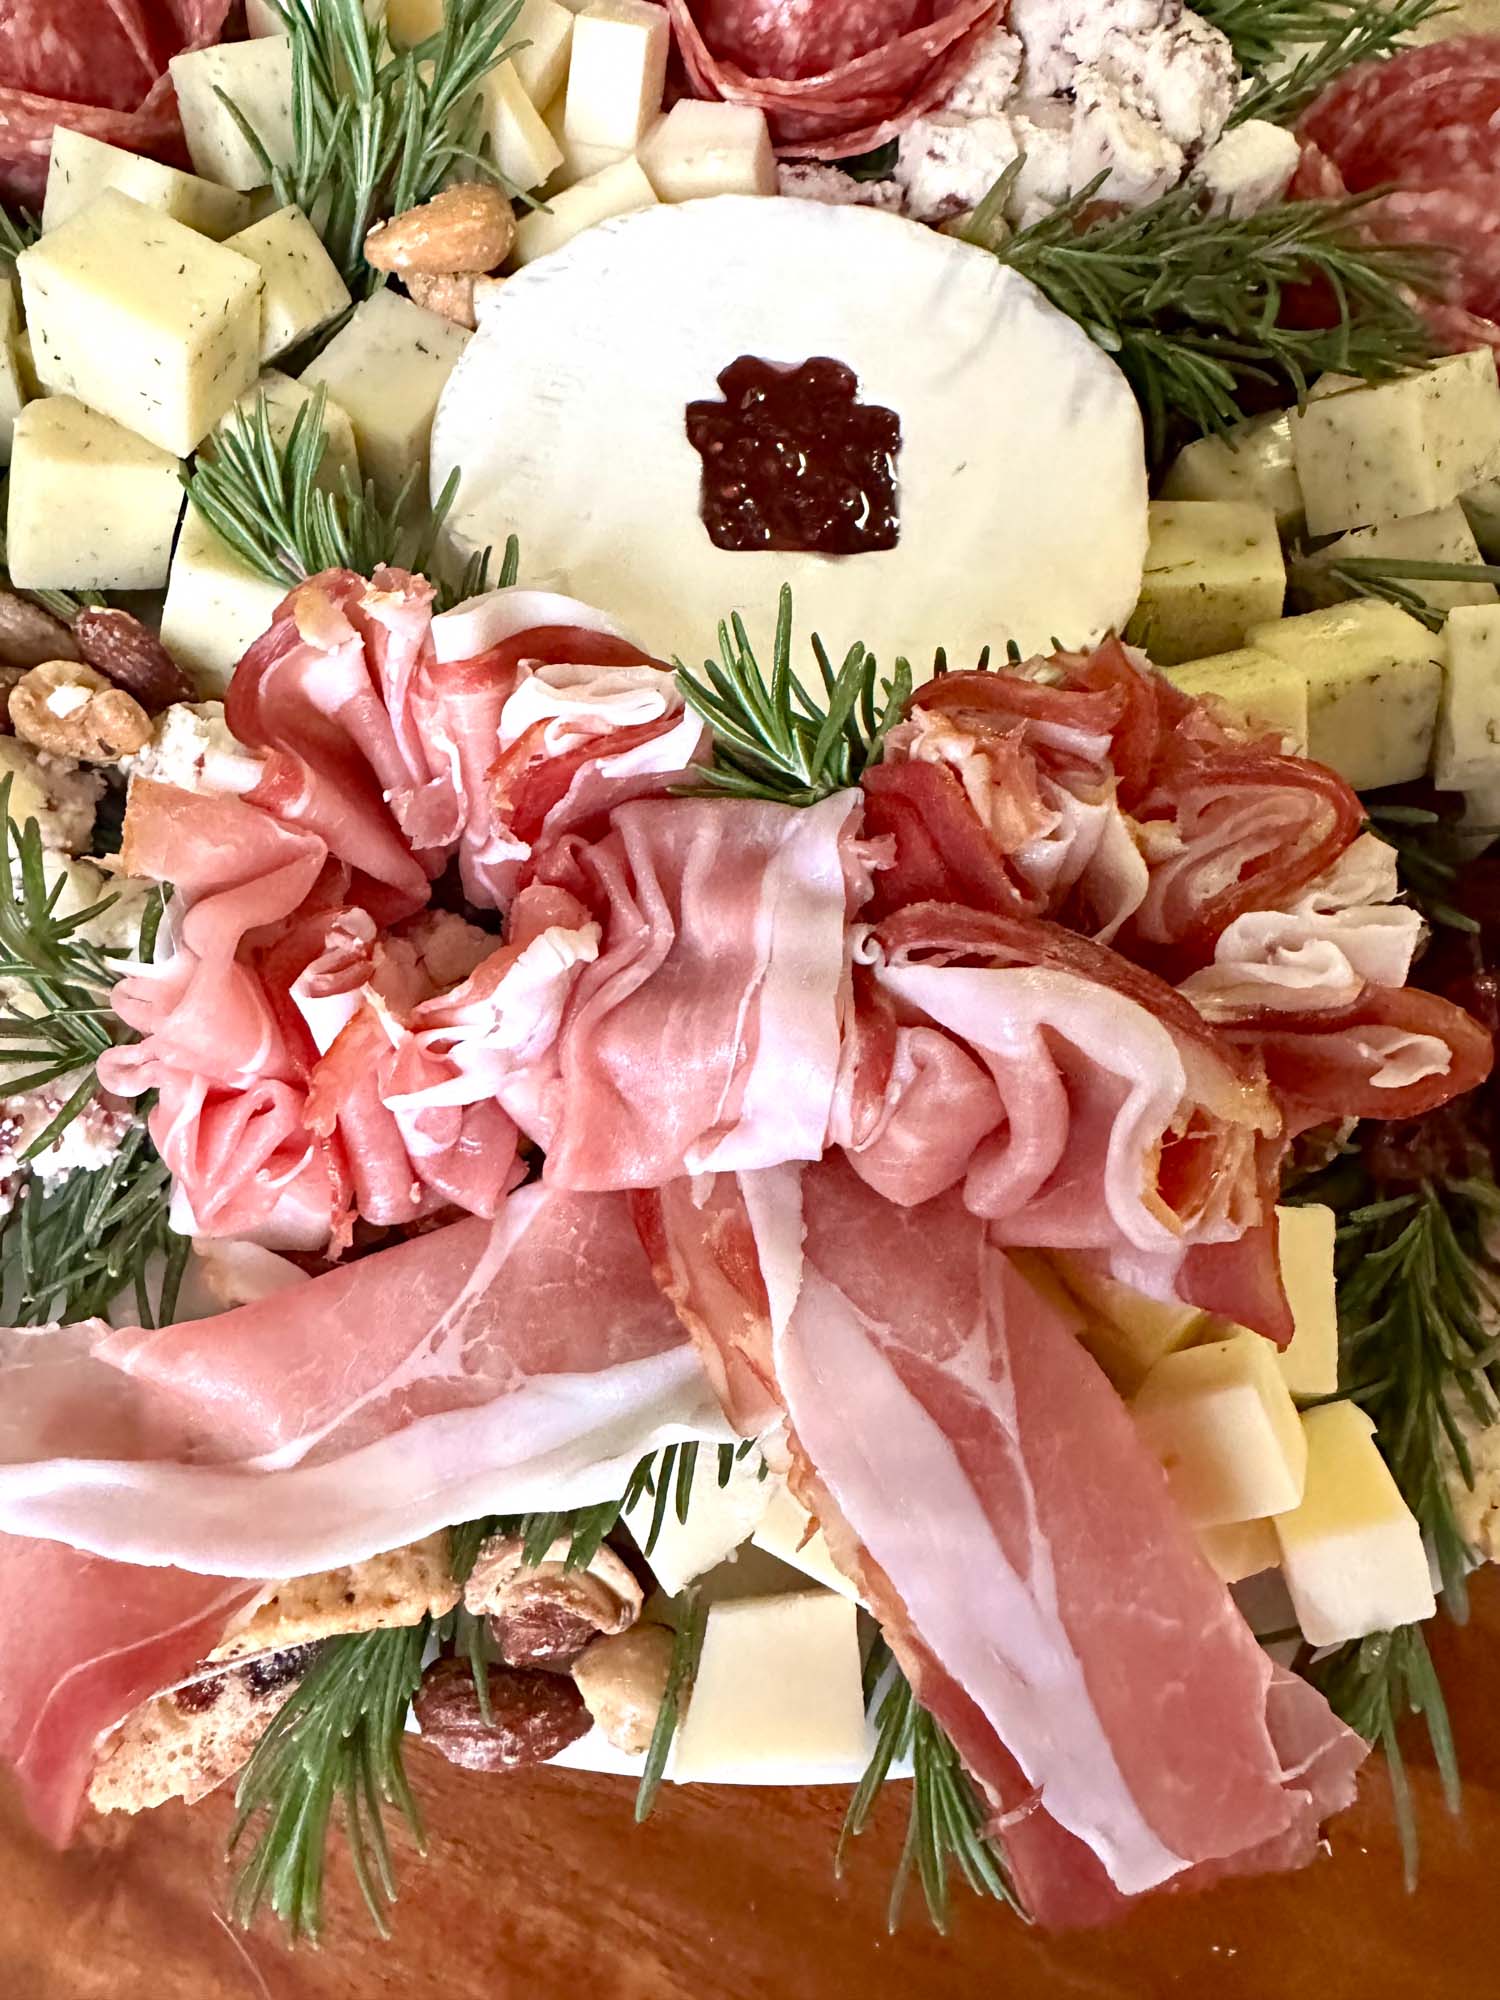
- Voilà! You’ve got a beautiful, edible finishing touch for your wreath.
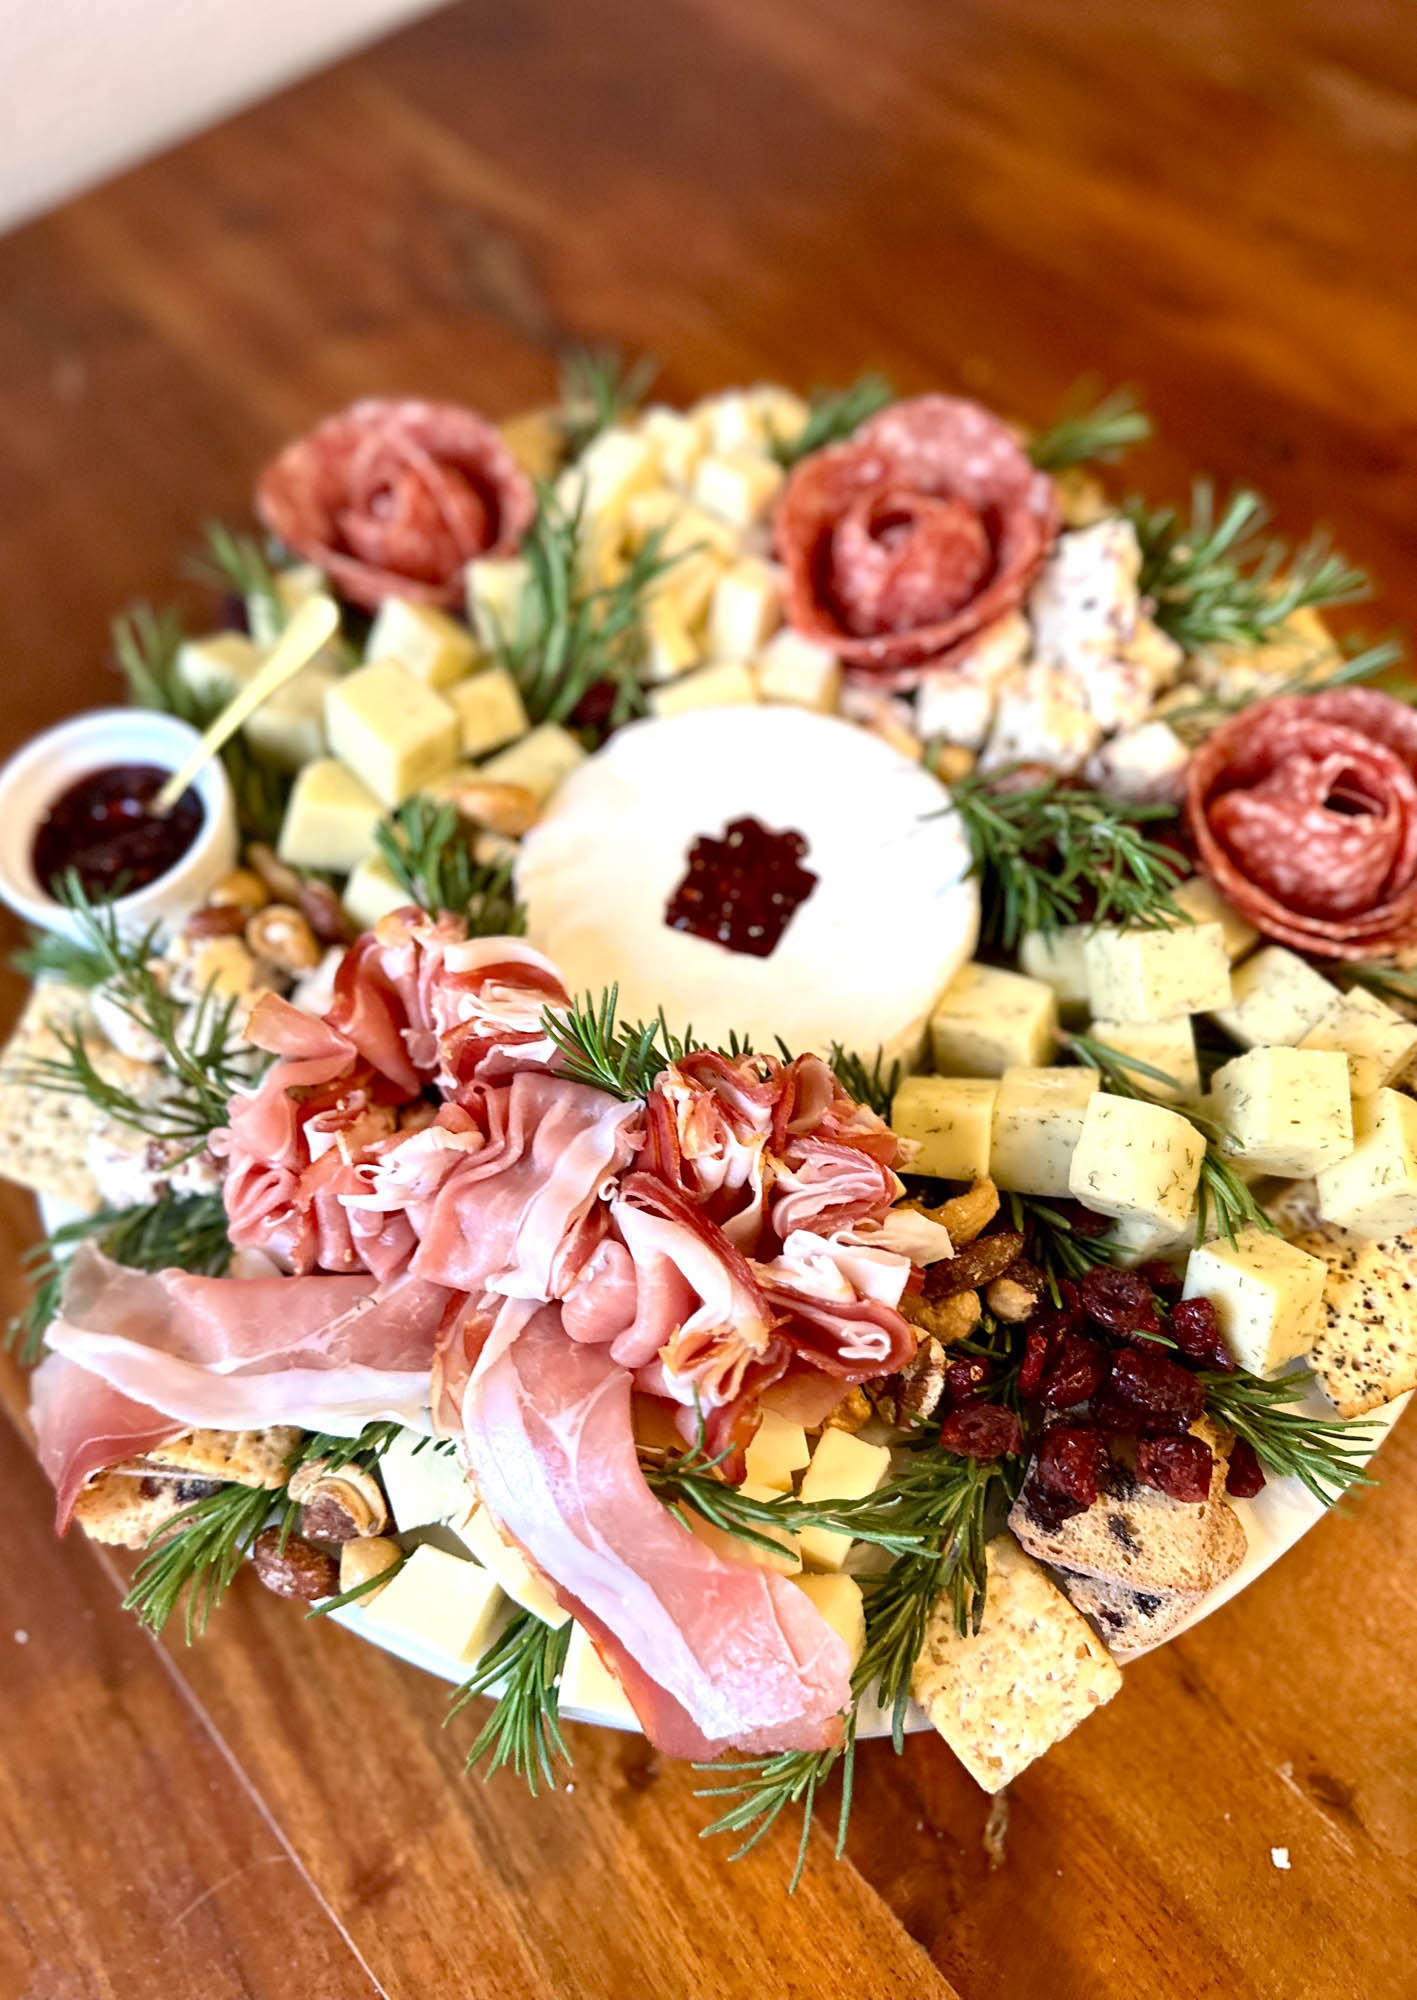
And there you have it — just a few simple steps to assemble a Christmas wreath charcuterie board! With a few seasonal touches and a fun circular shape, you can give this classic appetizer an easy, festive twist.
Merry Christmas!
Charcuterie 101
Looking for more tips on how to elevate your charcuterie boards beyond the holidays? This guide will help you create balanced, beautiful boards any time of year.

An Easy Charcuterie Board Template that Wows
Learn my simple formula for building a gorgeous charcuterie board, plus get a free printable template when you join my email list!
